The Imperial Shadow Council: Japan in Darkest Hour

Part Ten: Don’t Let The Giant Out Of Bed (North America: April – August 1939)

a01.jpg


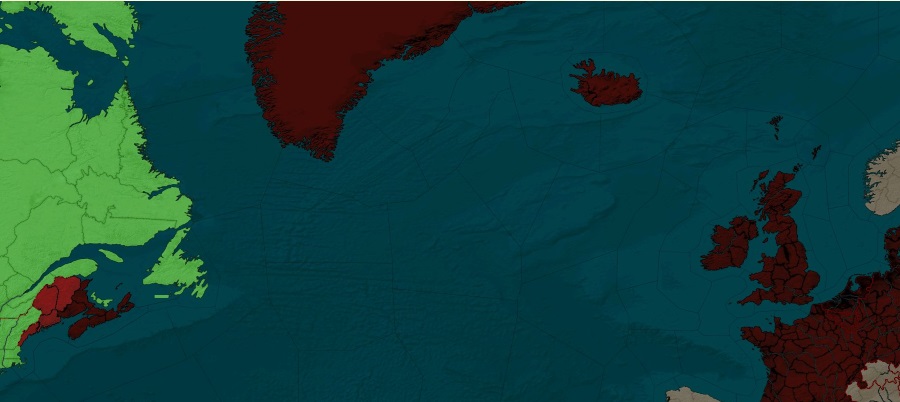
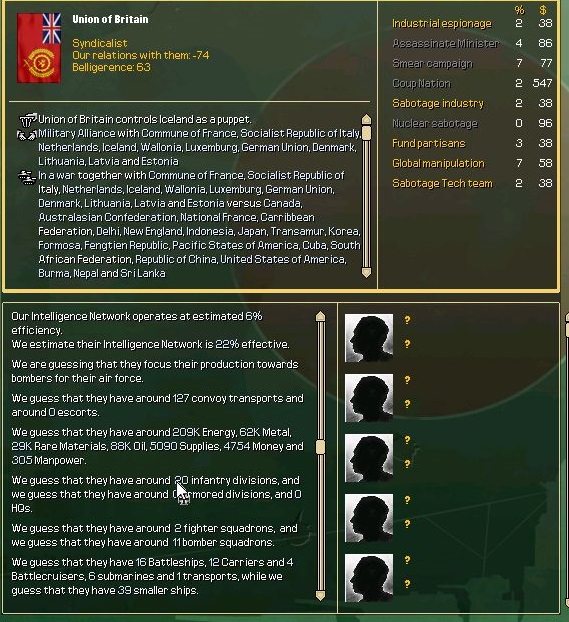
The conflict between the Internationale and the British broke out in earnest in spring 1939, as the British invaded Iceland, securing the important North Atlantic base.

a02.jpg


They then followed up with a misinformation campaign which convinced the Entente to fortify Newfoundland. Instead, the British sailed past the heavily defended island and landed in Nova Scotia, meeting no Canadian resistance.

a03.jpg


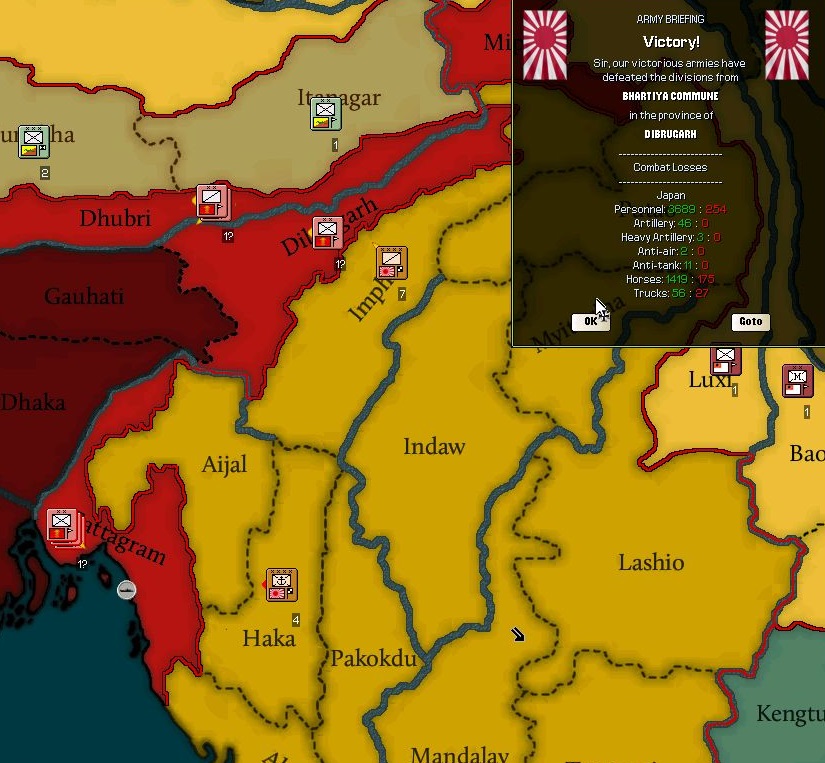
It was these developments that convinced the Shadow Council, which had voted to assist both Delhi and Canada, to prioritize assistance to Canada.

A04.jpg


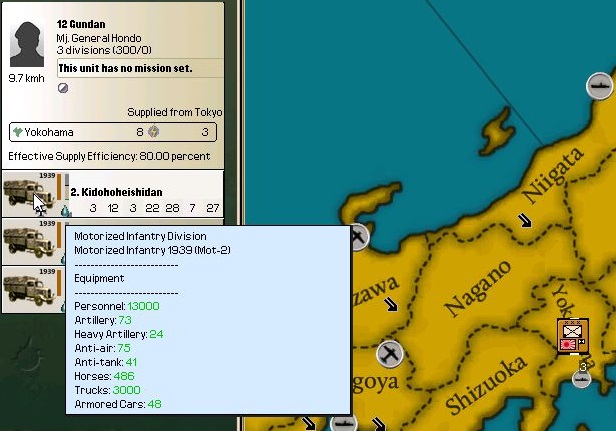
The first units of the Japanese Expeditionary Force, after sailing to Alaska (to avoid enemy naval patrols), embarked trains to Fargo, North Dakota.

a05.jpg


The appearance of thousands of Japanese troops in Fargo was a bizarre event, but for the most part the locals were welcoming of the visitors, especially as the forces of the Pacific States were stretched thin.

a06.jpg


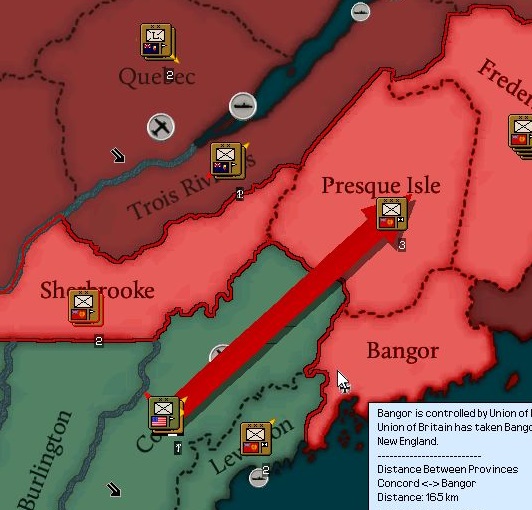
The second voyage from Japan brought two of Japan’s three cavalry corps, and these forces were dispatched to Montreal in order to defend against the British invasion of the Atlantic provinces.

a07.jpg


a08.jpg


a09.jpg


After a brief stay in Fargo to regroup after the long trip, the Japanese Expeditionary Force – Midwest was dispatched to Nebraska, where they began their assault across the Missouri River.

a10.jpg


a11.jpg


The syndicalist defenders lacked in experience and equipment what they had in bravery and commitment, and the numerically superior veteran Japanese forces easily forced a retreat.

a12.jpg


a13.jpg


The JEF-MW struck south, crossing the Missouri for the second time, towards Springfield.

a14.jpg


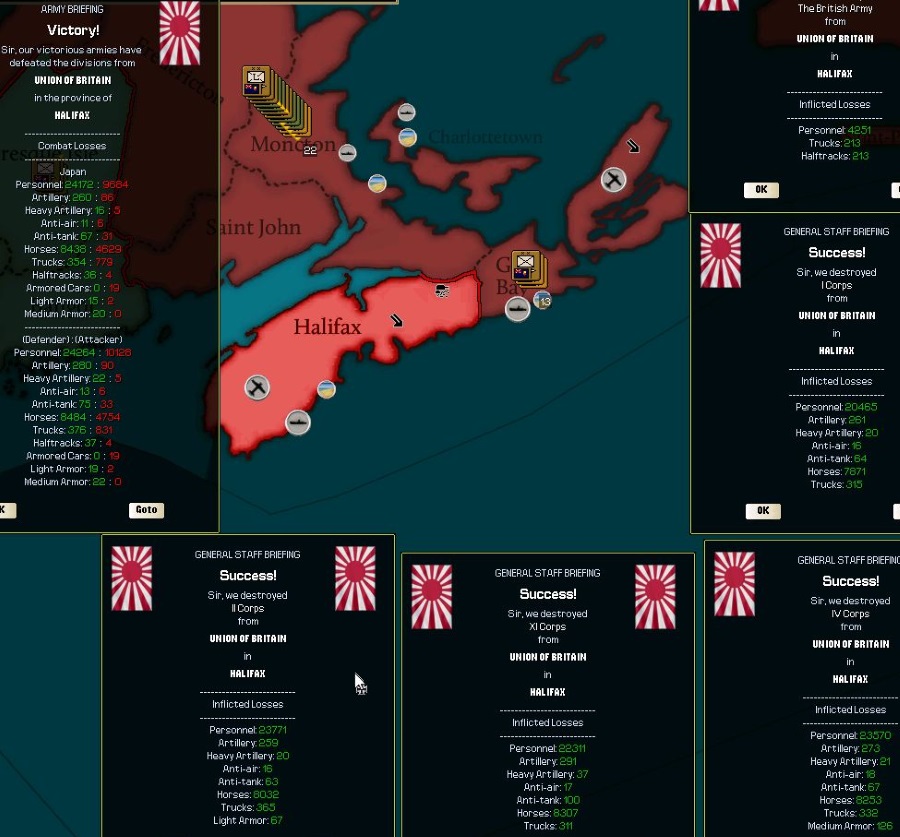
The Japanese Expeditionary Force – Atlantic Canada, arrived in Montreal in the nick of time to shore up the city’s defenses against the British, who had already captured Quebec City.

a15.jpg


a16.jpg


a17.jpg


The British, accustomed to light and disorganized Canadian resistance, were unprepared for the large and rapid Japanese force which arrived to repel them.

a18.jpg


JEF-AC split in two and advanced upon the city. One force rapidly moved to retake the southern bank of the St. Lawrence River, while the other prepared in Montreal.

a19.jpg


Surrounded and outnumbered, the British lost well over sixty thousand troops in the Quebec Debacle, as it would be called in London. For a nation that invested heavily in its navy and relatively little in its army, the loss of five divisions was a tremendous blow.

a20.jpg


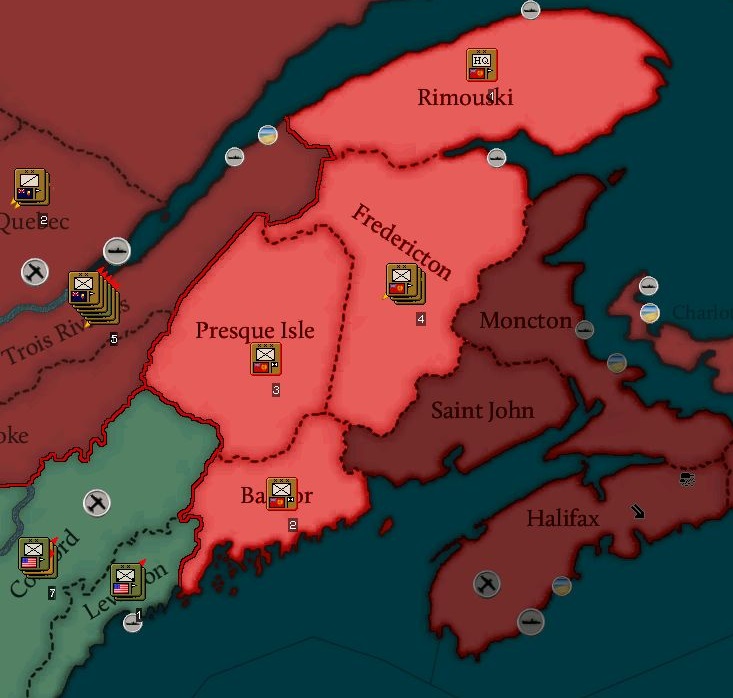
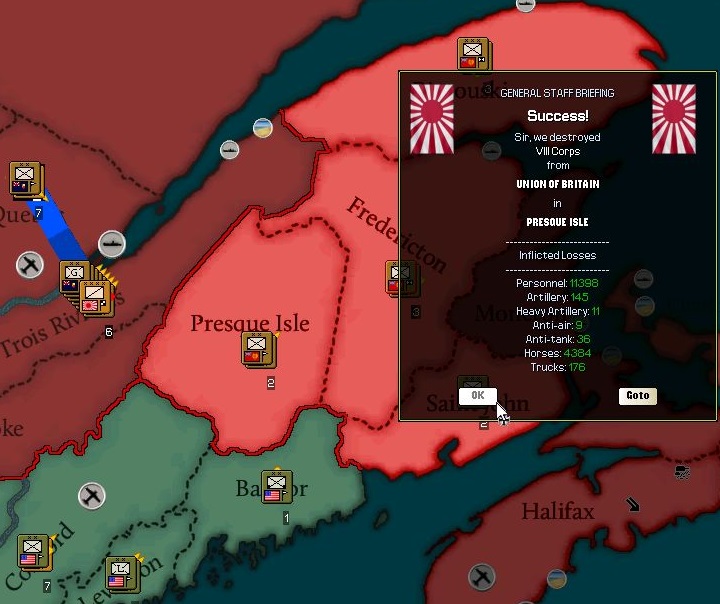
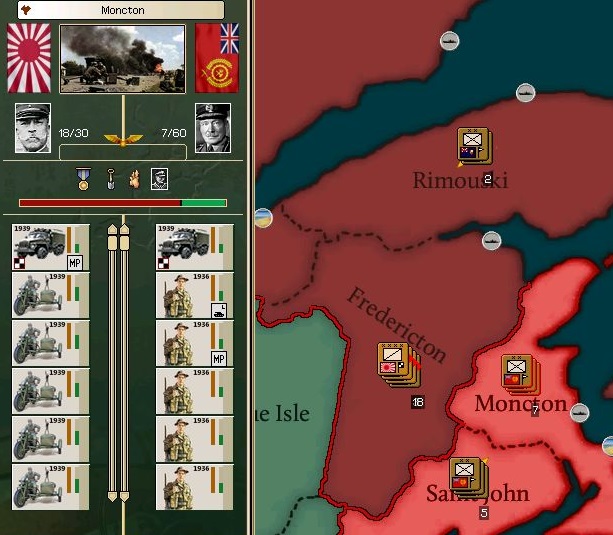
The forces destroyed in Quebec represented just under half of the British invasion force, and the Japanese were eager to destroy the rest. With Canadian armor counterattacking from Maine, one half of JEF-AC struck from the northwest.

a21.jpg


a22.jpg


Meanwhile in the Midwest, JEF-MW was split into two. The poor quality of the syndicalist militias meant they could be easily beaten back by the skilled Japanese professionals. St. Louis fell easily, a demoralizing loss for the Combined Syndicates.

a23.jpg


a24.jpg


The bad news continued for the Internationale as two more British infantry divisions were isolated and destroyed on the Gaspé Peninsula.

a25.jpg


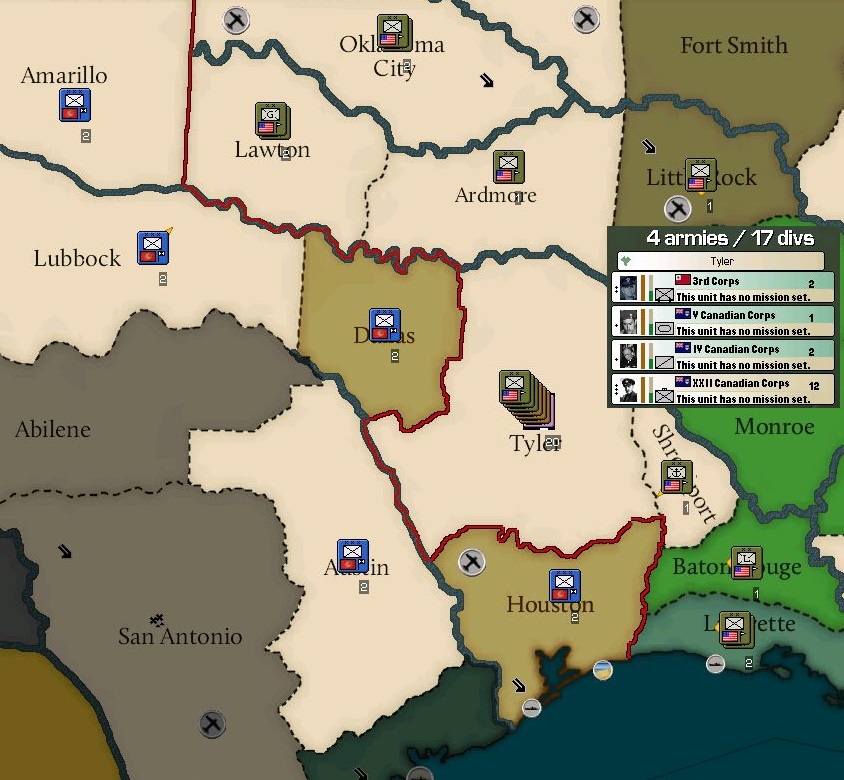
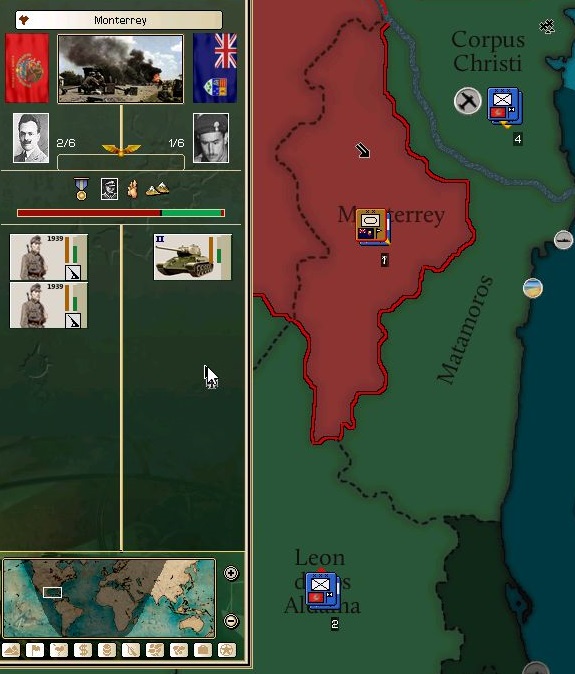
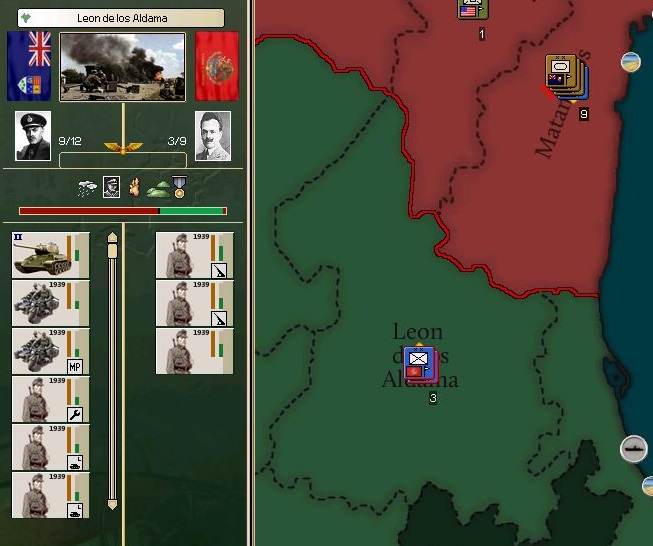
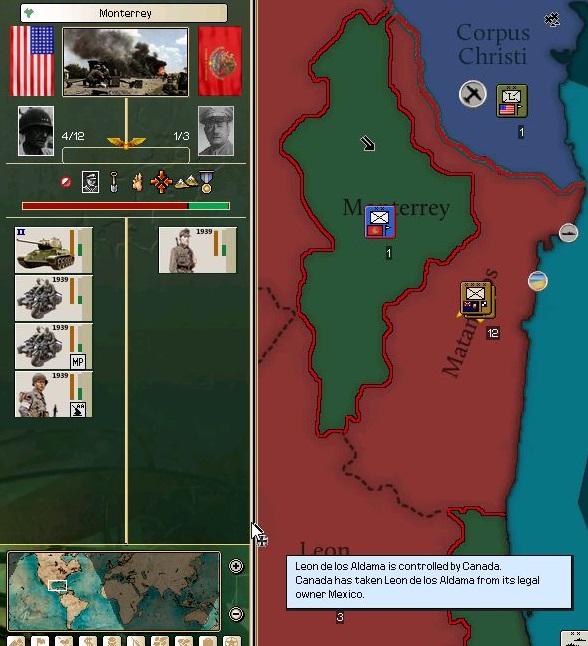
The JEF-MW’s capture of Saint Louis revealed an enormous shortcoming in the syndicalist’s defenses. By splitting the forces of Missouri in two, the Japanese were able to push half west, trapping them in Oklahoma. While their co-ideologues in Mexico sympathized with their plight, they were unwilling to risk the protection that their neutral status provided and so did not assist them. The other half of the defenses were pushed into Illinois, while Canadian cavalry began to push south into undefended Arkansas.

a26.jpg


a27.jpg


With the enemy divided, the path to Chicago lay open.

a28.jpg


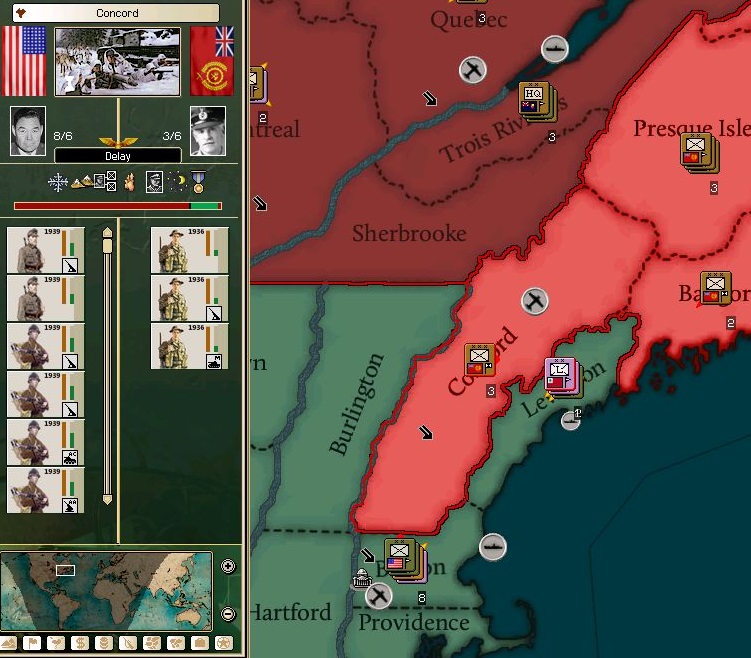
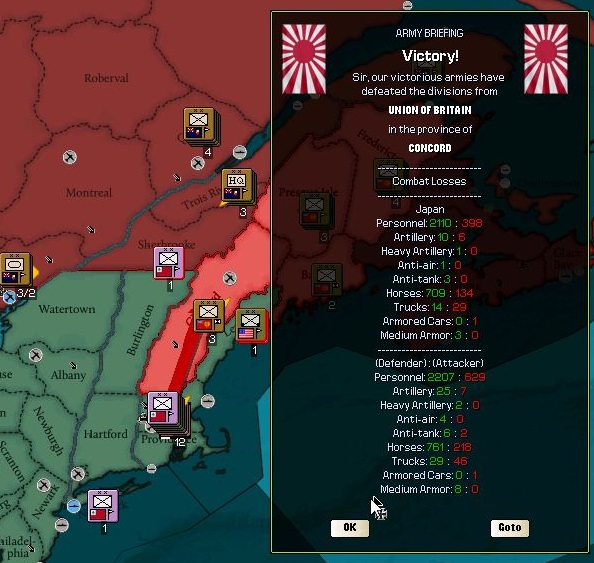
Meanwhile, half of JEF-AC was split off and reassigned to become the Japanese Expeditionary Force – New England. The Entente had captured New York in the first days of the war, and now Japanese cavalry was marching down Broadway.

a29.jpg


JEF-NE began their assault through a mad cavalry rush across the George Washington Bridge. After a few weeks of stalemate as the opposing sides exchanged token fire and raids across the Hudson, the syndicalists had been expecting such a bold maneuver.

a30.jpg


a31.jpg


The reassignment of JEF-NE weakened JEF-AC, and so the Japanese were forced to give up some ground to the British.

a32.jpg


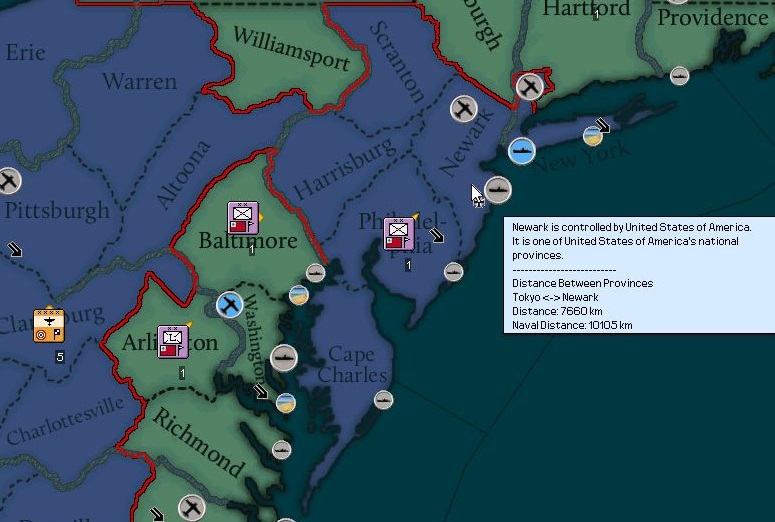
The temporary setback was not a disaster, as the British were still bottled up and contained in Nova Scotia and Maine. However, the setback was worth it, as the industrial centers of Newark and northern New Jersey fell to the Entente.

a33.jpg


a34.jpg


a35.jpg


The maneuverability of the Japanese cavalry, along with the well-developed infrastructure of the American Northeast, made it possible for the Japanese to rapidly advance into Philadelphia and then Baltimore, threatening the creation of a pocket in Pennsylvania.

a36.jpg


a37.jpg


a38.jpg


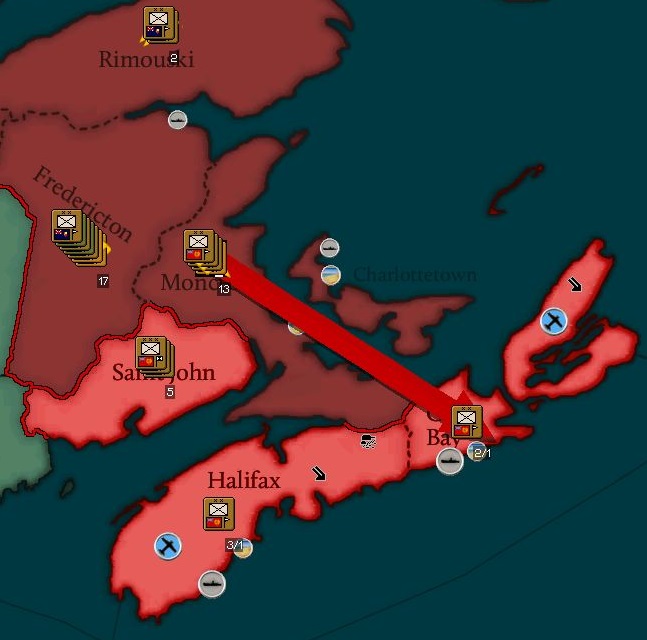
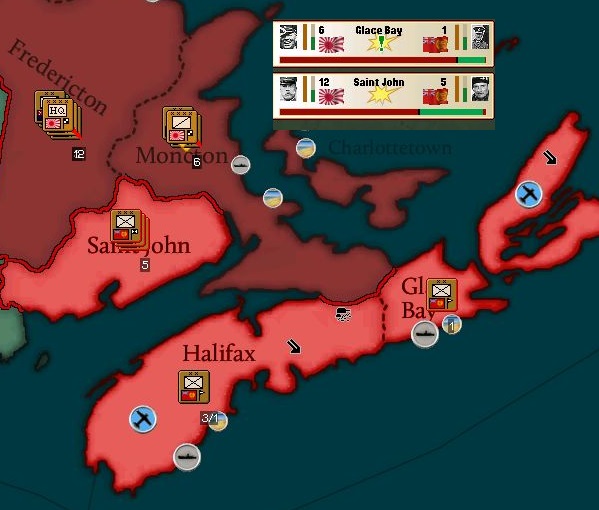
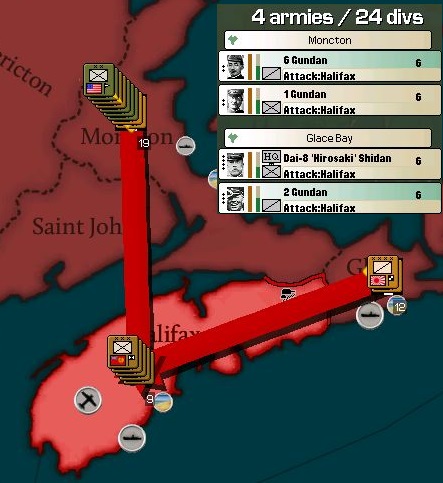
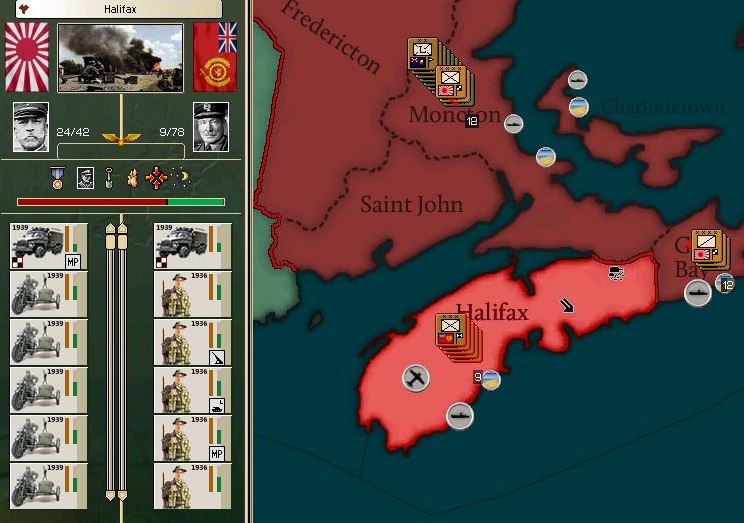
The temporary setback in the Maritimes was reversed as the slower Canadian infantry finally caught up with the Japanese cavalry and halted the British counterattack. By holding the gateway to Nova Scotia, the Entente was able to prevent the British forces in southern New Brunswick from retreating to a position of strength in Nova Scotia. Two more British divisions were lost.

a39.jpg


The Japanese advance was Baltimore was halted by the appearance of elite syndicalist infantry. Though it was possible that the Japanese could have forced their way past the enemy, Koji Sakai’s doctrines held that the Japanese should not be fighting bloody battles if they had another choice, and so they elected to hold their position in Philadelphia and allow Entente infantry to reinforce their positions in New Jersey.

a40.jpg


The enemy’s morale was badly shaken when Canadian infantry marched into Chicago, forcing the Reed regime to flee to the abandoned Washington offices of the United States government they had defeated only a few years prior.

a41.jpg


a42.jpg


a43.jpg


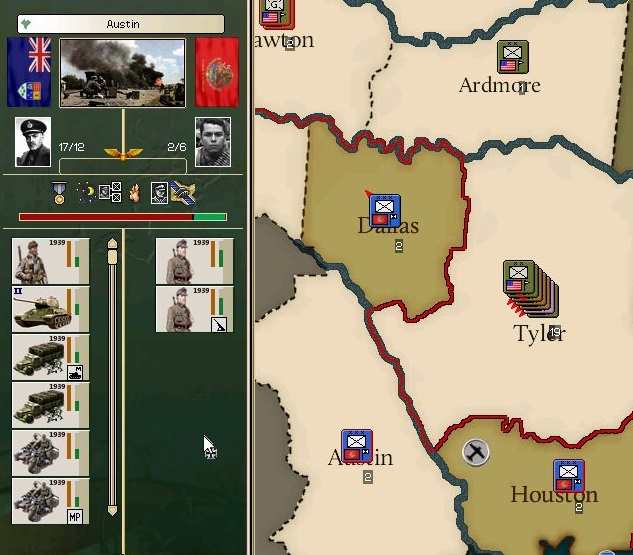
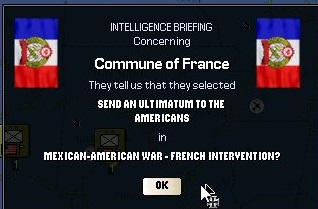
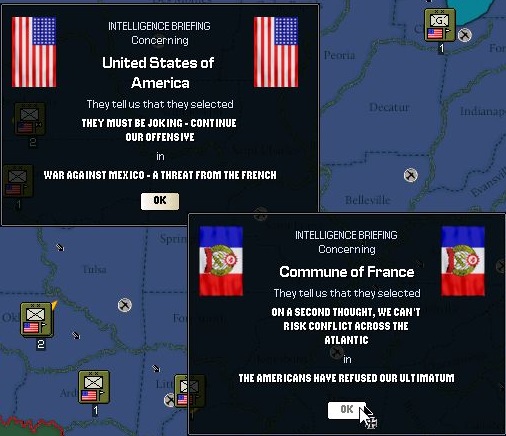
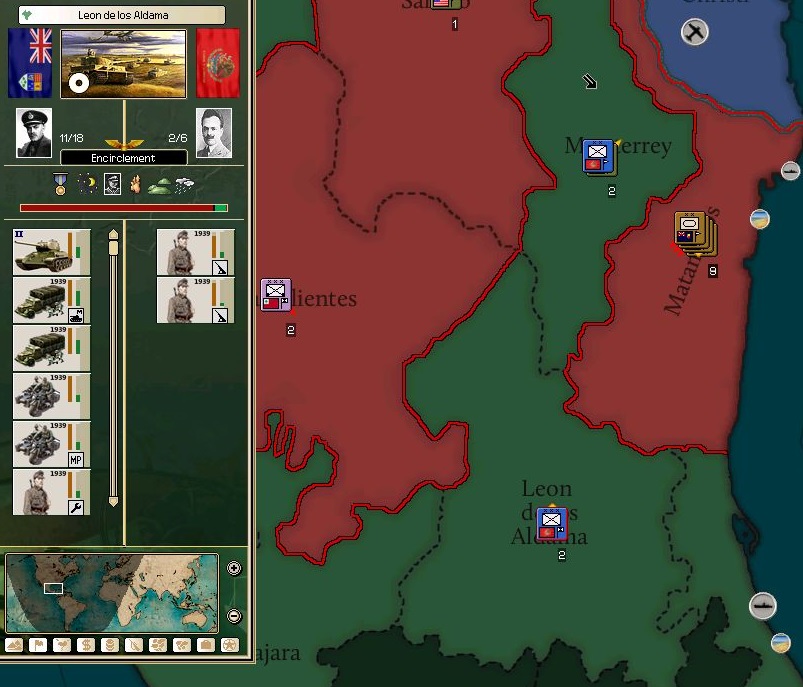
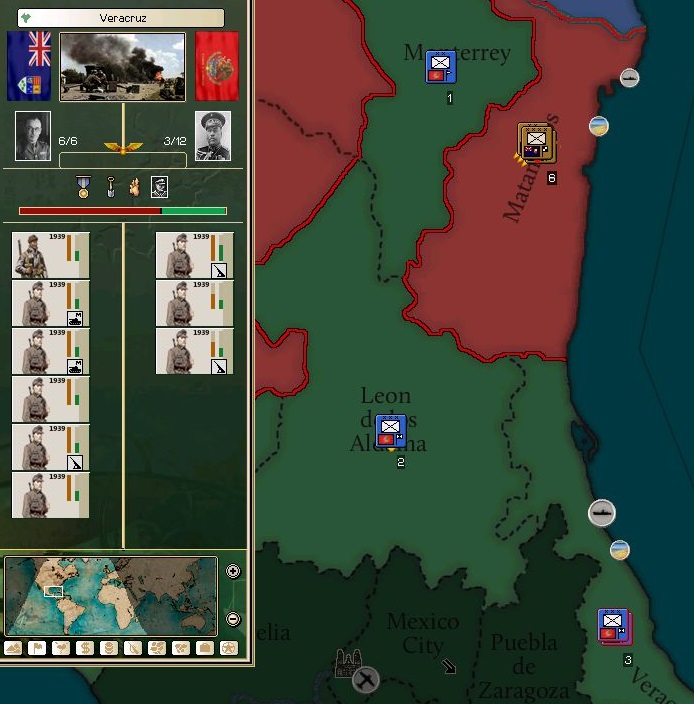
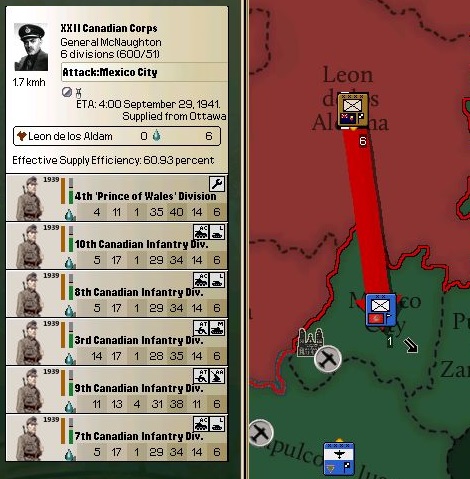
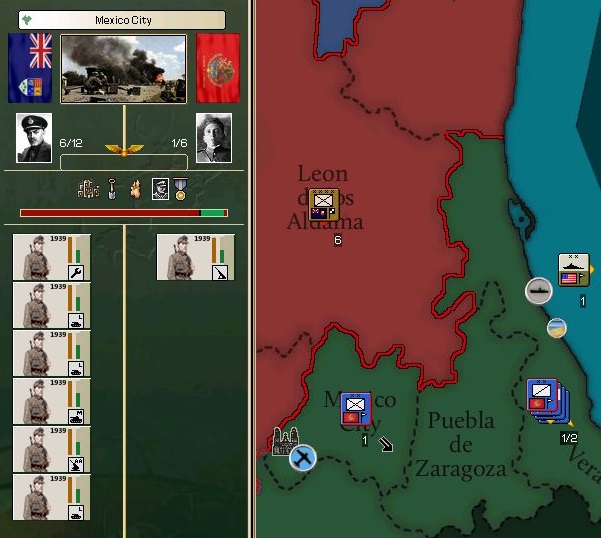
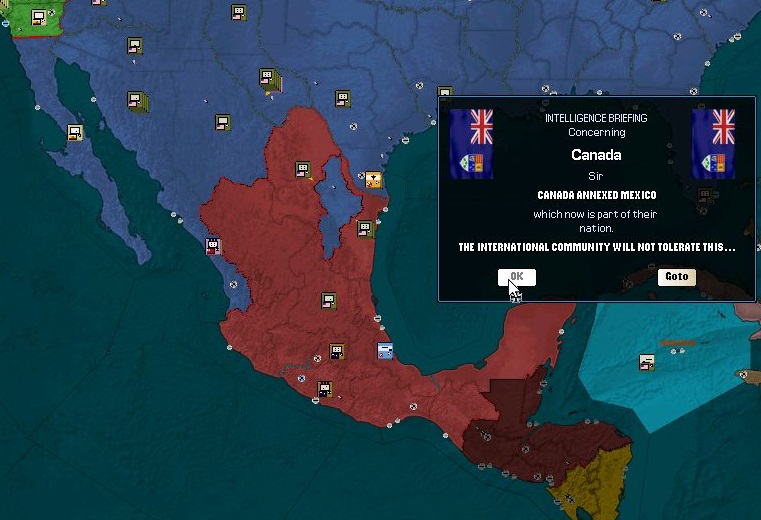
As Chicago fell, a major controversy erupted as Mexico denied the Combined Syndicates permission for their troops to flee across the border. The Communal government in Paris was irritated that a socialist nation would abandon their co-ideologues, but Mexico was about to find itself very much alone in North America, and so wisely elected not to antagonize the Entente.

a44.jpg


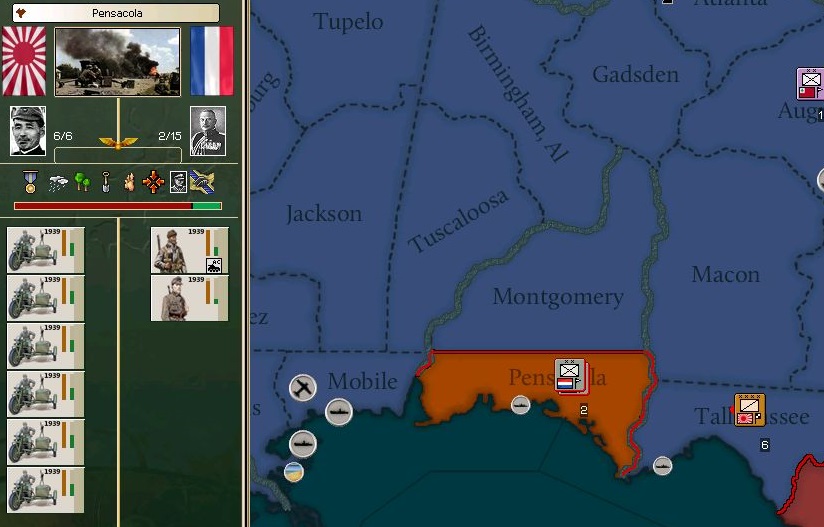
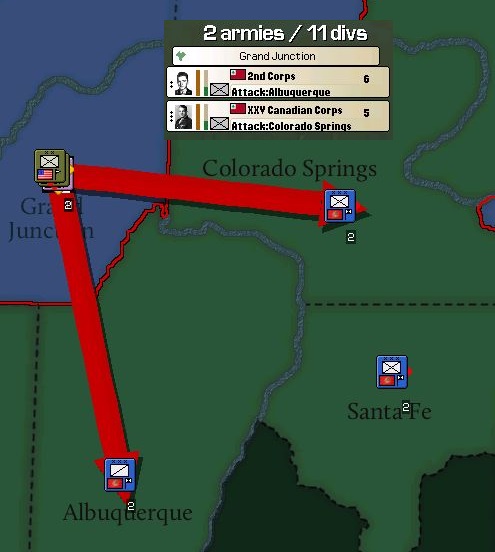
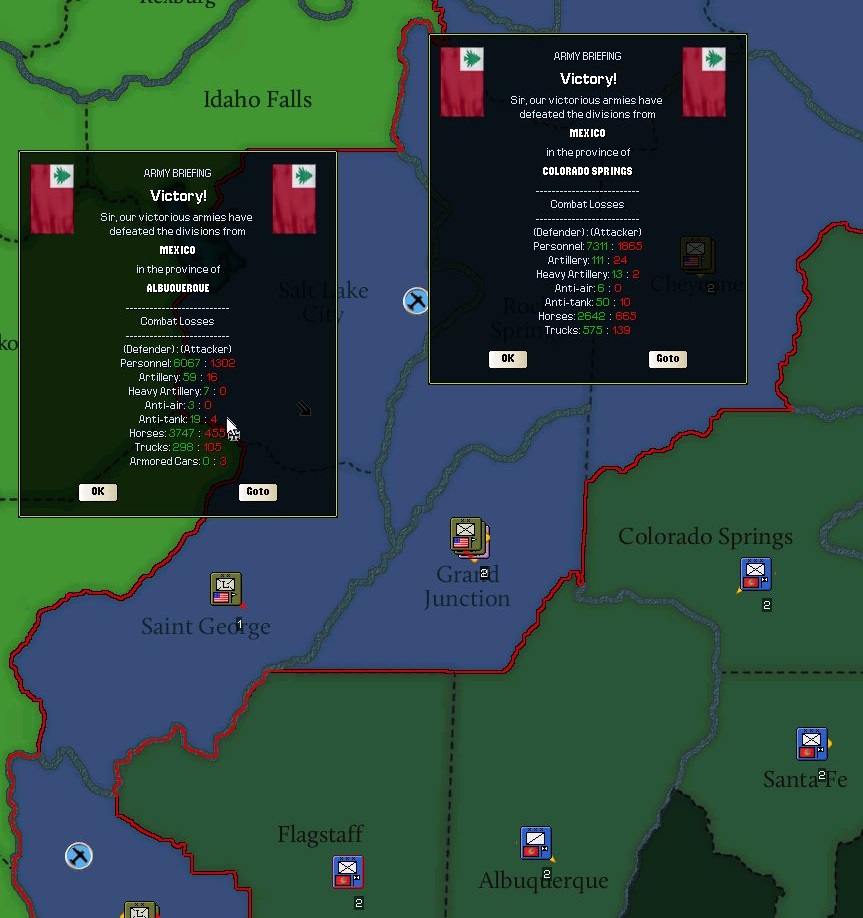
With the Oklahoma pocket destroyed, JEF-MW decided to begin an advance southwards towards New Orleans.

a45.jpg


And in the east, JEF-NE began a renewed assault on Baltimore. Japan had turned the tide in North America, and it was doubtful that the syndicalists would survive the winter.

No votes, as the next update is contemporaneous with this one. Votes for further policy will occur at the next update.

 
Part Eleven: Nippon Asian Syndicalism In The Bud (Asia: April – August 1939)

c1.jpg


As Japanese forces prepared to ship off to the front lines of the war against the Internationale, the other Sphere members were tasked with wrapping up the war against Germany’s mainland Asian possessions.

c2.jpg


Korean forces crossed the straits to Hainan island, sailing on a makeshift fleet of ferries, junks and steamers cobbled together from across the south of China. The German garrison in the area put up a spirited defense but was outnumbered by more than ten to one.

c3.jpg


The capture of Hainan was the final goal that the Minseito government set before they would make their final determination on how to proceed with Chinese independence.

c4.jpg


The Minseito partnered with the Shakai Taishuto to overcome vociferous Seiyukai opposition to the reformation of the Republic of China. The republican movement, which counted socialists and liberals under its wide umbrella, was judged to have the most support and to be the most reliable option. The Seiyukai strongly protested the removal of a monarch and that the door was left open for socialists to be in power as part of the republican movement. However, the Qing Emperor had almost no legitimacy in China, despised as a German figurehead who was not efficacious enough to push back the Japanese.

c5.jpg


Another bone of contention between the Seiyukai and the Minseito was the bold pan-Chinese claims of the new republic. The republic claimed to be the legitimate government of the territories controlled by the National Protection Alliance and the Russian puppet states in the northwest, something that was viewed as a provocation to Russia.

c9.jpg


More controversially, the republic also claimed sovereignty over the Legation Cities as well as the territory of the Fengtein Republic.

c6.jpg


The first elections took place a few months after independence, and the victory of the social democratic ticket proved a source of delight to the Shakai Taishuto and a source of anxiety to the Seiyukai.

c7.jpg


Soong Ching-Ling, the widow of Sun Yat-sen, was elected President, immediately becoming the most powerful woman in the world. Her Vice President was Zhou Shuren, a celebrated author better known as Lu Xun.

c8.jpg


The two won a tremendous victory riding a wave of nationalist sentiment. China, argued the pair, was not going to accept a new Japanese master as a replacement of the German master which had just been evicted. The Minseito and Shakai Taishuto, once again over strong Seiyukai opposition, agreed to respect Chinese independence and not to attempt to impose anything resembling the unequal treaties which Qing China had been subjected to in the past.

ca.jpg


Behind the scenes, a secret deal was worked out, where the Republic would agree to allow the Japanese command to direct their armed forces in exchange for the Japanese government’s public promises regarding Chinese independence.

~*~*~

v1.jpg


The German colony of Indochina represented a potential source of resources for the Sphere. In order to bolster the image of the Sphere as a pan-Asian internationalist anti-colonial movement, Manchurian and Transamurian forces were tasked with the capture of Vietnam. No Japanese forces were involved.

v2.jpg


The German presence in Vietnam was small and outnumbered by the invading Sphere forces by about 5 to 1. Hanoi fell quickly and the forces fanned out, one half pushing west into Laos and the other south along the Vietnamese coast.

v3.jpg


Transamurian cavalry moved quickly and against little resistance, as the local population was not interested in the slightest in assisting their colonial masters.

v4.jpg


A significant amount of German troops were trapped in the mountainous border region with Thailand and forced to surrender after being surrounded by Manchurian forces.

v5.jpg


Transamurian forces assisted by some of the new Chinese Republican Army surrounded and captured almost thirty thousand Germans in the southern tip of Vietnam, bringing the front to a quick and decisive close.

~*~*~

b1.jpg


After the emergency transportation of Japanese forces to North America, enough transport ships were freed up to begin the planned invasion of Burma.

ba.jpg


The Japanese captured Rangoon with almost no resistance and the Marines immediately began to advance north towards the capital.

b2.jpg


After Bhartiya forces began to pour into Burma, the Marines were redirected to Bassein to defend the beachhead in Rangoon. As a response to this development, the cavalry corps earmarked for Delhi was redirected to Burma.

b3.jpg


b4.jpg


The arrival of the cavalry secured the beachhead and allowed the Japanese to continue their plan to thrust north towards Mandalay.

bb.jpg


The marines struck north, to secure the western bank of the Irrawaddy river for an assault on Mandalay.

bc.jpg


After assisting the cavalry, the marines moved back south to prevent the Bhartiya Army from capturing Rangoon.

b5.jpg


The cavalry quickly secured Mandalay, destroying some of the Bhartiya Commune’s precious few warplanes in the process.

b6.jpg


With Rangoon and Mandalay both under Japanese control, the socialist regime of Burma collapsed.

b8.jpg


The front was far from complete, as the Bharitya Commune continued to fight in Burma.

i1.jpg


The government of Delhi was privately irritated by the Burmese adventure, as they (correctly) interpreted it as a way for Japan to expand their sphere of influence. Delhi had envisioned that they were going to defeat the Bhartiya and then annex Burma but they dared not complain as they did not wish to risk a further delay of Japanese assistance, which finally arrived in August.

i2.jpg


Despite the tension between the governments, the population in northwest India welcomed the Japanese as saviors.

i3.jpg


The arrival of the Japanese Expeditionary Force – India brought great relief to the overstretched Delhi forces, and so the rivalry among the two allies for Asian dominance was forgotten, and Delhi, faced with the potential of being destroyed altogether, learned to accept that it was going to play second fiddle to Japan in Asia.

~*~*~

drought.png


The positive progress of the Entente and Sphere during the summer was overshadowed domestically by the Great Drought of 1939.

ethiopia1.jpg


The one story that would have delighted the population was the much-anticipated Ethiopian-Japanese royal wedding, but unfortunately that was delayed by an Ethiopian civil war.

ethiopia2.jpg


Fortunately for Japanese interests in the area, the rebels were put down in short order.

ethiopia3.jpg


With the unrest resolved, the wedding finally occurred, and the Japanese population welcomed the distraction from the daily difficulties of war, even a victorious one, and the drought.

middleeastwar.jpg


The news of two Empires celebrating a marriage was a stark contrast to the events taking place north of Ethiopia, where two other emperors, the Persian and Ottoman, found themselves at war. This followed the expected declaration of war by the Arab bloc on the Ottoman Empire, which was in a state of collapse.

worldwar.jpg


This process was helped along by the Ottoman’s inability to expect assistance from the Germans. War had finally come to the European continent after exploding across Asia and North America.

worldwar2.jpg


Though the Germans overran most of the Netherlands, the French quickly pushed through Belgium to link up with their ally. The great fleets of Germany and Britain and the great armies of Germany and France were finally at war with one another as well as with the Entente, providing the alliance some much-needed respite as summer of 1939 turned to fall.

POLICY VOTE: Chinese Expansion

china.jpg


PROBLEM: The newly reconstituted Republic of China does not yet cover all of China, and the republicans, united behind Soong Ching-Ling and Zhou Shuren, are not shy about proclaiming their desire to reincorporate the remainder of China into the new state. Of the regions they do not control but claim, Manchuria is out of the question and the Russian client states cannot be attacked without triggering a war with Russia itself, something that Japan, let alone China, is not yet prepared for.

However, the National Protection Alliance is isolated and unpopular, their republican supporters deserting them for the new Beijing government. Their territories in Yunnan province and Tibet contain industry and resources that would be beneficial to the Chinese armament effort.

In addition, the Legation Cities of Shanghai, Ningbo, Fuzhou and Hong Kong remain independent of the Republic and continue to assert their independence according to the treaty system that established them. However, with the demise of the United States, the old French and Russian republics and the United Kingdom, the only guarantors of this system remaining are Germany (which Japan is already at war with), Japan’s two allies Australasia and Canada, and Japan itself. The Entente and Japan would lose their special economic interests in the area, but Canada and Australasia are willing to give that up if it means the Chinese Republican Army can more rapidly become a major fighting force in service of the Entente’s goals.

The catch is that there is little domestic support for either of these adventures, and so there would need to be some “improvised” justifications for Japan to sign off on the operations. In the case of the NPA, their occupation of Hoa Binh in Vietnam provides the possibility of a manufactured border clash, and in the case of the Legation Cities, there can be an accusation that the administration is assisting the German legations in espionage against the Sphere. Even with these operations, we can expect there to be significant domestic backlash. Neither adventure would utilize Japanese forces, instead Sphere forces would be re-deployed from Vietnam to assist the Chinese Republican Army.

Option A: Invade the Legation Cities

legation%20cities.jpg


Global manipulation espionage operations will be used against the Legation Cities, and we will declare war on them. We would gain 7.8% dissent.


”The Legation Cities are a scar, an offensive remnant of the exploitative system under which the Chinese proletariat languished for decades. They are colonies, and if the Minseito is serious about its anti-colonial rhetoric then they must agree to help the Chinese reclaim them.” - Hiromi Maida, Shakai Taishuto member of the Diet


”The Legation Cities are obsolete and a thorn in our side. We honor our treaties to protect their shipping, which delivers the products of those industrial cities to our enemies in Europe. We cannot abide these havens of German espionage in our midst. It is time for the Legation system to end.” - Youta Tawara, Seiyukai member of the Diet


Option B: Destroy the National Protection Alliance

npa.jpg


Global manipulation espionage operations will be used against the National Protection Alliance, and we will declare war on them. We would gain 7.8% dissent.


”If the Chinese republic is to have legitimacy then it cannot have another contender, no matter how weak and unimportant. We must permit them to annex Yunnan and Tibet.” - Kazutoshi Noda, Minseito member of the Diet


Option C: Integrate Both the Legation Cities and National Protection Alliance into the Republic

Global manipulation espionage operations will be used against both the Legation Cities and National Protection Alliance, and we will declare war on both. We would gain 7.8% dissent for each declaration, for a total of 15.6%.


”A strong China is essential to our security. Along with a united India and North America, a united China would provide the Entente with by far the greatest amount of manpower of any alliance in the world today. We should be doing everything in our power to assist the Chinese to expand, as every bit of industry they have to produce more arms for their multitudes will make it easier for the Entente to score a final and total victory for democracy.” - Masa Kogawa, IJA Officer


Option D: Do Nothing

”This is madness. A united China is bound to end up even stronger than Japan, and then we will be powerless to stop them from turning us into their puppet. We will defeat the Germans even if we ignore their presence in the Legations, and if the Russians want Tibet then let them have it. Do not let your idealistic naivete permit the republicans to destroy the Sphere from the inside.” - Yoshiki Hirose, Domei member of the Diet
 
Part Twelve: Madison and Roosevelt’s Worst Nightmares Put Together (America: Winter of 1939)

gc01.jpg


The destruction of numerous syndicalist divisions along the Oklahoma-Texas border gave the Entente the decisive advantage in the Lower Mississippi region.

gc02.jpg


gc03.jpg


With the war in Europe taking a turn in favor of the syndicalists, some of the Reed regime’s European allies sent assistance, but none, barring the British, came close to matching the level of support the Japanese were providing. The lone Dutch division that arrived in Louisiana to assist the Americans was welcome, but not nearly enough.

gc04.jpg


gc05.jpg


gc06.jpg


The Japanese seized New Orleans after a brief battle against the Dutch-American defenders.

gc07.jpg


Rather than turning north to pursue the retreating defenders, the Japanese moved further east, intent on capturing any port that could be used to deliver further European supplies and reinforcements.

~*~*~

ne01.jpg


Meanwhile in the Northeast, the Japanese were coming up against spirited resistance in Baltimore, a city with more syndicalist sympathies, and thus more civilian support for the enemy, than the Deep South.

ne02.jpg


The cavalry could have overrun the city through their superior numbers in time, but military command ordered them to call off the attack and wait for further assistance.

ne03.jpg


That assistance came in the form of JEF-AC, redeployed from New Brunswick, where the British had been bottled up in Nova Scotia. Entente military command had elected for the Japanese mobile assets to be used to capture the remaining industrial centers of the Entente as well as their secondary capital in Washington.

ne04.jpg


ne05.jpg


This time the battle went more in favor of the Japanese.

ne06.jpg


ne07.jpg


The Japanese cavalry were more mobile than anything the syndicalists had, and after the capture of Baltimore, one of the corps quickly ran around Washington and seized the western bank of the Potomac, surrounding Washington.

~*~*~

mw01.jpg


The effort to capture the syndicalists industrial heartland was conducted along two axes. The Japanese cavalry attacked along the New York-Washington corridor, while JEF-MW, fresh off the capture of Chicago, was tasked with assaulting the syndicalist heartland from the west.

mw02.jpg


mw03.jpg


Before the Japanese could feel secure about moving east towards Ohio and Pittsburgh, they needed to establish total control over the strategically important junction of the Ohio, Tennessee and Mississippi rivers.

mw04.jpg


With Canadian forces having captured Kentucky and Japanese forces Indiana, the remaining syndicalists in southern Illinois found themselves surrounded and surrendered after a short battle.

mw05.jpg


With that job done, the Japanese could now focus upon Ohio.

mw06.jpg


With syndicalist attention focused against the Japanese invasion of the Mid-Atlantic and the New York/Michigan front that had been raging since the war’s beginning, only poorly trained and undermanned militia units defended Cincinnati. Columbus was similarly poorly defended, and Cleveland was assaulted by Canadian cavalry rounding Lake Erie out of Michigan.

mw07.jpg


Ohio was under control, and now Pittsburgh, the great American steel city, was about to fall.

~*~*~

app01.jpg


Of their original heartland, the syndicalists had lost all but a narrow band of Appalachian towns in the center of Pennsylvania.

app02.jpg


app03.jpg


Many syndicalists hoped that the Appalachians could be a redoubt for the movement, where they could hold out long enough for European assistance to arrive in greater force.

app04.jpg


However, the syndicalists were spread too thinly, and the rapid advance of Japanese and Canadian forces prevented them from digging into potentially highly defensible positions in West Virginia.

app05.jpg


Three syndicalist divisions were trapped in the Delmarva peninsula, retreating all the way south to Cape Charles, where they were captured, almost able to see the great American naval base of Norfolk.

app06.jpg


app07.jpg


That base would then also fall, driving the American Navy from their most important supply base.

app08.jpg


The coastal plains of North Carolina fell with ease, and the remaining syndicalist forces in Virginia fled in the face of overwhelming Canadian strength from northern Virginia.

~*~*~

south01.jpg


After so many defeats, the syndicalists were now forced to base themselves out of Atlanta, home base of their bitter enemy, the American Union State.

south02.jpg


With the loss of the Gulf Coast and the Mid-Atlantic, the syndicalists only had a few major cities left, ones that were mostly hostile to their cause just a few years earlier.

south03.jpg


The Japanese cavalry, newly semi-motorized, was eager to test out its new equipment and elected to leave the enemy in Wilmington to the slower Canadian forces following behind. Instead, the South Carolina coast, and generally the road to Florida and Miami, was their goal.

south05.jpg


One old Southern port town after another fell to the Japanese.

south04.jpg


The Japanese infantry, meanwhile, moved from Mobile northeast to Atlanta.

 
south06.jpg


There they came upon General Aalto, tasked with defending the third and final capital of the Combined Syndicates of America.

south07.jpg


Some government officials had fled to Miami, perhaps hoping to flee to Mexico or Centroamerica. The Japanese cavalry moved rapidly down the Atlantic coast of Florida, preventing any hope of Miami becoming a fourth capital.

south08.jpg


Indeed, most of the Reed regime had already fled to France, and the few rabid defenders left stayed to defend Atlanta, a city that had seen the demise of three Lost Causes to date.

south09.jpg


Miami did not have such a dramatic last pitched battle. Instead the enemy there was not prepared for a serious assault by land.

south10.jpg


Both cities fell, leaving the most diehard defenders backed up against the Gulf Coast of Florida.

south11.jpg


For all intents and purposes, the Combined Syndicates was dead.

south12.jpg


The British expeditionary force in Tampa continued to fight on, as did the Dutch in Pensacola.

south13.jpg


The British hoped to be evacuated, not home to Britain, but to Atlantic Canada. The Europeans had all but won their war against Germany, and so further British reinforcements were sent to Nova Scotia and busted out, once again reaching Maine.

south14.jpg


Japanese forces were once again deployed to New England, where this time there were no distractions. The British would be thrown into the sea, once and for all.

south15.jpg


south16.jpg


The British incursion in Atlantic Canada notwithstanding, the Entente was treating the war in America as finished. The United States was re-established, and the Midwestern states elected to rejoin the union as opposed to staying with the Pacific States. While there were questions about the status of New England, or if the Pacific States proper would rejoin the Union, or what would be done about the Mexican occupation of the Southwest, there was peace, and the Entente had secured a continent for itself.

No votes, as the next update is contemporaneous and covers events in Asia and the world at large.

 
Part Thirteen: The Borneo Identity (Asia & The World: Winter of 1939)

born01.jpg


The Imperial Japanese Navy was disappointed when their new allies utterly failed to capture German possessions on Borneo and New Guinea and instead lost the islands entirely. The Imperial Japanese Army was strapped for divisions with the emergencies in India and America, and so for much of 1939 the command had to be content with submarine operations to attempt to cut off the garrisons of both island from resupply. Given that the Germans were also contending with Internationale fleets in their home waters, a high percentage of supplies meant for Borneo and strategic goods from Borneo meant for Germany never made it to its destination.

born02.jpg


The commissioning of a new cavalry corps gave the Japanese the spare troops required to act against Borneo. The German airfield at Kuching had been able to harass Entente shipping in the South China Sea and the command was ready to secure the lanes entirely.

born03.jpg


Japanese cavalry came ashore unopposed in Brunei, where the Sultan, chafing under Germany’s demand for more war materiel, welcomed them.

born04.jpg


The welcome was short lived as the cavalry quickly departed to secure Kuching, the most strategically important city on the island due to its airfield.

born05.jpg


A German Marine unit and light infantry unit arrived to defend their headquarters.

born06.jpg


born07.jpg


born08.jpg


Japanese commanders were eager to retake the island as quickly as possible in order that the forces could be sent to take other German islands, and so the maximum amount of firepower was brought to bear, with Japanese battleships and bombers from Singapore bombarding the German defenses around the city.

born09.jpg


born10.jpg


The city fell quickly, and the Japanese captured hundreds of bombers. Mitteleuropa had been pursuing a policy where the air forces of the less advanced minor members of the alliance would defend Germany’s outlying possessions and free up skilled German pilots for battle with the expert British and French air forces in Europe.

born11.jpg


With Kuching under control, the cavalry corps split in two in order to take the coasts of the island as quickly as possible.

born12.jpg


born13.jpg


The fall of Kuching neutralized Borneo as a strategic asset for the Germans altogether, as it was the only major port and airbase on the island, but the Japanese refused to let up and forced the surrender of the German garrison a few months later. The Germans had been fleeing inland hoping to wage a long-term guerilla war in order to be a drain on Japanese resources, but the cavalry caught up with them before they could really establish themselves.

~*~*~

burm01.jpg


The surrender of Burma was a celebrated moment in Japan, not to the same scale to which the victory over the Qing was regarded, but nevertheless a positive moment for the Minseito.

burm02.jpg


burm03.jpg


Bhartiya forces in Burma continued to fight on, even though they were surrounded and forced to surrender in due time.

burm04.jpg


The collapse of the Commune’s ally was something the Bhartiya were not prepared for, and so only a handful of Bhartiya divisions were present to contest the Japanese.

burm05.jpg


The Marines did not have the mobility of the cavalry however, and so they were relegated to the coast and tasked with holding against the coming Bhartiya counter attack.

burm06.jpg


This was in contrast to the cavalry further inland near Imphal, which was able to trap a Bhartiya cavalry division in the far northeast corner of Bhartiya territory, in between the NPA and Bhutanese territory.

burm07.jpg


The surrender of the Bhartiya cavalry meant there was no longer a threat of the enemy getting behind Japanese lines and wreaking havoc in Burma and so a renewed push to the west began.

burm08.jpg


Japanese commanders in the theater were frustrated by the appearance of new Bhartiya forces which retook Imphal, but the general staff was pleased as it meant that divisions were being diverted away from the greater front between Delhi and the Commune. While the invasion of Burma had been a partially imperialist venture with the goal of expanding Japanese influence in South Asia, there was no question that any territories beyond the Burma-India border would be handed over to Delhi.

burm09.jpg


Therefore, there was little motivation to expend Japanese blood and treasure to push into Bengal. The Japanese High Command was satisfied with the progress made, and orders were given to secure Burma and to advance if possible, but no further assistance would be coming.

~*~*~

ind01.jpg


The Japanese Expeditionary Force in India, after halting the Bhartiya advance towards Gujarat, began to advance into the rest of Maharashtra.

ind02.jpg


ind03.jpg


Bombay was traded back and forth between Delhi and the Bhartiya Commune repeatedly, devastating the city, but JEF-India moved to cut off the city and capture it permanently for the Entente.

ind04.jpg


The presence of the Japanese in Burma and Maharashtra was the clear difference maker in the War for India. The Bhartiya Commune held the advantage over Delhi on most sections of the front, and Japan’s elimination of Burma from the war and the twenty divisions they involved were going to win the war for Delhi. The only question was how quickly.

ind05.jpg


ind06.jpg


The Entente sought to secure major cities. The former Princely Federation of Hyderabad was one such important target.

ind07.jpg


The Bhartiya attempted to keep fighting in regions other than these key cities, but there they found themselves cut off and unable to escape to the Bengal heartland of the Commune.

ind08.jpg


ind09.jpg


A consistent goal for the Entente was to push to the Bay of Bengal and separate the Bhartiya from their ally in Travanacore, and to surround the neutral Madras Republic and prevent them from attacking or being attacked by the Bhartiya. Delhi, after all, had designs on the whole of India.

ind10.jpg


ind11.jpg


JEF-India allowed for the encirclement and destruction of several Bhartiya divisions, giving Delhi a concrete advantage which had been elusive in the months before their arrival.

ind12.jpg


Before JEF-India was even able to redeploy for a northeastern attack, Delhi cavalry was already pushing into the lightly defended southwest corner of the Bhartiya heartland. The Commune’s days were numbered, and it was a good thing, as the Japanese divisions were bound to be required on another front.

~*~*~

arabwar1.jpg


Outside of South and Southwest Asia, the world war was going badly for the old monarchies of Europe. The Arab bloc decisively defeated their Ottoman foe.

arabwar3.jpg


The allies of Egypt and Arabia divided the spoils among themselves peaceably and did not, as many expected, begin to fight one another.

arabwar2.jpg


This was good, for the bloc quickly found themselves embroiled in war with Persia over that nation’s occupation of territories claimed by Hashemite Arabia.

denmark.jpg


denmarkalliance.jpg


expandedmittel.jpg


The Ottoman Empire, after being thrashed in their war with the Arabs, would decide to join Mitteleuropa and agree to help push back the syndicalists who seemed likely to conquer the whole of Germany. They joined Bulgaria and Denmark as new members of the alliance.

denmarkdead.jpg


Unfortunately, Denmark did not last very long.

berlin.jpg


To the surprise of nobody, the entry of the Ottomans did very little to stem the French advance, which captured Berlin in the winter of 1939.

turkey.jpg


In fact, the entry of the Ottoman Empire served only to anger the war-weary population, which supported a republican coup that ended the sultanate after six and a half centuries.

cyprus.jpg


With Turkey in chaos, there was also nothing to stop enosis between Greece and Cyprus, as any regional power that would have once objected was now in chaos or gone.

netherlands.jpg


luxembourg.jpg


France was destined to be the greatest power on the European continent, but they also treated their allies well, granting independence to Luxembourg and handing over Flanders to the Netherlands.

cavalry.jpg


The Japanese Empire, the Sphere, and the Entente in general was in a new threat environment. The main foes thus far had been the colonial German forces, the Qing Chinese, the Combined Syndicates and the Bhartiya Commune, none of which were particularly advanced militaries.

motorized.jpg


Thus, the Imperial Japanese Army increased their orders for trucks, eager to establish a truly motorized and mobile force in accordance with the doctrines of Koji Sakai.

ententearmies.jpg


ententenavies.jpg


The Entente was growing in members, though individually most of its members did not have the largest militaries in the world. Japan and Canada were both great naval powers.

britain.jpg


However, neither one could match the Republican Navy on their own.

france.jpg


And if Britain were to be defeated, the Communal Army on the continent would continue to control Europe proper, preventing the exiled French government in Algiers from returning home.

russia.jpg


And beyond all of this, the Russians menaced both power blocs. Their large army had the potential to tip the balance decisively against either of the two power blocs.

STRATEGY VOTE: The Invasion of Britain

islandhopper.jpg


PROBLEM: The Republican Army had made a continuous nuisance of itself in the Atlantic provinces of Canada, but with the Combined Syndicates defeated, it should be no trouble for the combination of the Royal Army and JEF-America to destroy them once and for all. It is the opinion of Entente intelligence that the British forces in Atlantic Canada represent a large portion of their entire army, and so the natural question is whether the destruction of this force should be followed by an attempt to invade Britain itself. Such an operation would follow the capture of Greenland, which France took control of after Denmark’s surrender, and the liberation of our ally Iceland from syndicalist control. Once Iceland is under control then it would be possible to land in either Scotland or Ireland. Specifics of the invasion plan can be decided upon in the future, but for now the question is if and for when the Japanese military should prepare to invade Britain. It is currently January 1, 1940, and all above military estimates are current as of that date. Five new carriers will be operational by the end of May. Operations against German colonial possessions in Asia will continue throughout 1940, and the hope is that the Germans will be induced to surrender by the time this proposed operation against Britain would begin.

Note: I would take military control of Canada for this so that I can run joint operations with both navies.

Option A: Invade by the Autumn of 1940

”The British Army will be weak once we smash them in Nova Scotia, and we must follow up this success by invading Britain. Doing so would remove our greatest naval threat and secure naval dominance for the Entente in the Atlantic as well as the Pacific. We must do it as soon as possible.” – Hideki Goto, IJN Officer


Option B: Invade by the Summer of 1941

”We would be stretching ourselves thin with this timetable. We need more transport vessels, more planes, more marines, more everything! If we rush this operation and our navy is destroyed at the hands of the British, then all of our successes could be undone.” – Hiroshi Sanada, IJN Officer


Option C: Do Not Invade Britain Before 1942

”Caution, caution, caution! What is the great rush to attack Europe? We should take our time consolidating control of Asia and America, and then examine the situation then. We should build more carriers, allow the Chinese time to build a large military, and wait to see if the Russians and syndicalists end up at war. Committing to an invasion at any time before 1942 is a needless risk and would only expose the Entente.” – Shinzo Makabe, IJN Officer
 
Part Fourteen: Face the Halifax (January – May 1940)

i01.jpg


i02.jpg


i03.jpg


i05.jpg


While the decision to not invade Britain in 1940 gave the Japanese more time to handle other fronts, there was still a desire for hasty victories to keep up public morale. The state of Travancore-Cochin had barely had time to truly get established before the war had begun, and so it was an easy target for the Japanese to snuff out.

i04.jpg


i06.jpg


i07.jpg


The more serious threat was certainly the Bhartiya in Bengal, and most of the Japanese forces were engaged against them.

i08.jpg


i09.jpg


i10.jpg


i12.jpg


i14.jpg


However, a full six divisions were dedicated to ending the southern ally of Calcutta, and while the surrender of Travancore-Cochin was to Delhi, the Japanese treated it as though it was almost entirely their victory.

i13.jpg


i16.jpg


With the surrender of the syndicalist sin the south, only the Bengal heartland remained, and Japan would initiative the critical Battle of Cuttack, which would prove to be the last effective stand of the Bhartiya.

i18.jpg


i19.jpg


The Bhartiya were forced to retreat from Cuttack, and their retreat would not stop even in Calcutta. The capital of the Bhartiya Commune fell almost anti-climatically, and with it fell the Commune.

i20.jpg


i21.jpg


i23.jpg


The end of the war in India allowed for the re-establishment of Nepal and Burma, as Indian and Japanese clients respectively, as well as the establishment of an independent Sri Lankan state, also under Indian control.

i22.jpg


Japan had committed 23 divisions, 12 infantry, 7 cavalry and 4 marines to the Indian War, and their intervention had surely been vital to the success of Delhi. It is unfair to say that Delhi could not have won without Japanese help, but certainly they could not have won so quickly without Japanese help. With the job done, the divisions began a long march to Rangoon, where they would be redeployed elsewhere.

i25.jpg


i26.jpg


The Japanese also handed over all territory in Bengal to the sovereignty of Delhi, ensuring a cooperative relationship between the two allies in the future wars to come.

i24.jpg


The only challenge remaining to Delhian dominance in India was the Madras Republic, and they had foolishly refused bend the knee.

i27.jpg


Japan declined to divert any of its forces south to help Delhi, and Delhi did not need their help. A climactic battle in Madurai represented the last bastion of India outside of the Entente, and Delhi forced their surrender after a month. India was united and independent, and its tremendous population was on the side of the Entente, something that was bound to be of great benefit in the coming years.

~*~*~

New Guinea had been a source of annoyance and embarrassment to two of Japan’s allies. Japan had elected to focus first on Burma in order to help save Delhi from syndicalist invasion, and then on Borneo in order to secure the vital shipping lanes in the South China Sea. Throughout this entire time, both Canada and Japan leaned on Australasia to handle the New Guinea situation. They had hedged repeatedly, and finally Japan elected to deal with it themselves.

ng01.jpg


The invasion of New Guinea began with a landing near Buna in the (de jure) German portion of the island.

ng02.jpg


ng03.jpg


The Japanese cavalry which had invaded Borneo were re-assigned to the invasion of New Guinea.

ng04.jpg


ng05.jpg


The location of Buna allowed for the landing cavalry to immediately assault the two most strategically important cities on the island: the Australasian port and airbase of Port Moresby and the capital of German New Guinea in Lae.

ng06.jpg


The capital of the Indonesian province of New Guinea was important in the sense that it needed to be retaken in order to re-establish Indonesian control of their land, but it was not as strategically important as Port Moresby or Lae, as it had no large port facilities or an airfield.

ng07.jpg


With the two of the island’s three regional capitals taken, the Japanese turned their attention westwards.

ng08.jpg


ng09.jpg


ng10.jpg


Apparently, the Germans on New Guinea learned nothing from Borneo and also attempted to retreat further inland, but were, just like the Germans on Borneo, overrun by the rapid Japanese cavalry. The presence of cavalry was a good thing because the island was large and had poorly developed infrastructure, and so it would take a time before the island was fully reconquered. Nevertheless, the two major airfields were taken and half of the German garrison had surrendered. The true battle was effectively over.

~*~*~

am01.jpg


am02.jpg


Despite the surrender of the Reed regime, there was still a good amount of fighting left to do before North America was secured. British and Dutch forces were still operating in North America. The Dutch presence was wiped out only a few weeks after the surrender of the Reed regime.

am03.jpg


The British presence in Atlantic Canada had proved to be more enduring, having been reinforced with new divisions from the homeland. They had little chance of actually completely defeating the Canada in addition to the re-established United States and the Japanese Expeditionary Force, but the geography of the Atlantic Provinces meant that they had a few chokepoints they might be able to hold for a time. The British were a veteran and effective force, and so they did have some success in holding the mountainous regions of northern New Hampshire against a Japanese-American attack from Massachusetts.

am04.jpg


am05.jpg


The sound tactics of the British were not enough to make up for the growing numerical advantage of the Entente in North America and so the Japanese-American attack seized New Hampshire and moved right on into northern Maine.

am06.jpg


The province of New Brunswick had, in a relatively short period of time, been taken by the British, retaken by the Japanese, retaken by the British, and was now about to be retaken by a Canadian-Japanese assault. Considering this flurry of activity, the province was suitably devastated.

am08.jpg


am09.jpg


The British effort to supply their invasion force in Canada and Maine had been taxing, and many of the frontline units had not been properly supplied, and so more than one unit surrendered without even retreating to the potential stronghold of Nova Scotia.

am10.jpg


For what would hopefully be the final time, Entente forces entered the province of New Brunswick, forcing the British to retreat to the southeast from Fredericton.

am11.jpg


The British being evicted from Maine and the Dutch from Florida meant that the fighting on American soil was over, and so the three Entente governments which occupied American soil could begin to figure out what their new arrangement would be. Negotiations for a permanent and comprehensive settlement did not begin at this point, but New England did agree to return New Jersey, Delaware and most of Pennsylvania back to the United States, as well as agreeing to putting New York City under a condominium between the states of New York and New Jersey. This effectively meant that the United States government could use New York City and its important port facilities to deliver war materiel to the east and what would shortly be the European war effort.

am12.jpg


am13.jpg


Japanese and Canadian forces funneled through the Moncton region, separating the five divisions in southern New Brunswick from their comrades in Nova Scotia.

am14.jpg


Prime Minister King did not wish for there to be an enormous bloody battle in the most important city in the Atlantic Provinces, especially if the Entente was going to be attempting an invasion of Britain, and so the Japanese cavalry moved to take northeastern Nova Scotia, and the Japanese infantry moved to eliminate the British infantry trapped in Saint John.

am15.jpg


The loss of the divisions in Saint John was a major disaster for the British, which of all the great powers had the smallest army.

am16.jpg


An attempt at a British counterattack against Moncton failed quickly, and the Entente took the time to move their forces into an optimal arrangement to take Halifax as quickly as possible.

am17.jpg


The Japanese were in position before the Canadians and Americans, and so they began the attack on the city without them.

am18.jpg


The British invasion of Canada, which had only been prevented from seizing Montreal and Toronto due to the timely intervention of the Japanese Expeditionary Force, came to an end in Halifax, as twelve Japanese cavalry and twelve Japanese infantry divisions assaulted the city. There was no bombardment from sea or air, as Prime Minister King was determined to protect as much of the port infrastructure as possible.

am19.jpg


If the surrender of the British in Saint John was a major disaster, the Battle of Halifax was a cataclysm.

am20.jpg


The British invasion of Canada was a gamble, which would have delivered the resources and industry of North America to the Internationale if it had succeeded. Instead it failed, and failed on an unprecedented scale. The British lost hundreds of thousands of soldiers in Canada, by some estimates almost three fifths of their army. Britain, as always throughout its history, would be safe as long as its navy could defend it, but they had failed to neutralize the Royal Navy and had done nothing against the Imperial Japanese Navy. The Republican Navy could still make a reasonable claim of ruling the waves, but the ability of Britain to engage in overseas adventure was completely shattered.

~*~*~

news01.jpg


The Japanese High Command was extremely pleased to have finished the wars in North America and India, but those efforts would be nothing compared to the daunting task of liberating Europe from the syndicalist scourge. One of the very first things the Japanese military was going to need was a greater transport capability. They would have to deliver Sphere troops from Asia to Europe in large quantities and quickly.

news04.jpg


news07.jpg


news08.jpg


This need became more and more glaring as France completed its conquest of Mitteleuropa.

news05.jpg


Indeed, the declaration of war against the Italian Federation meant that, in addition to France and the newly syndicalist Germany, Italy would likely become a major power in its own right.

news02.jpg


news06.jpg


The logistics of a war in Europe while not having any allies in Europe were daunting, but the collapse of the German Empire did provide some good news. The German colonies in Aden and Somaliland were taken by Yemen and Ethiopia, making the Horn of Africa neutral territory for the first time.

news03.jpg


More importantly, the Egyptian bloc completed its territorial ambitions by seizing the Suez Canal. As the Entente was on relatively good terms with the Arab bloc, it was now able to use the canal for the first since the war began.

news09.jpg


news10.jpg


Despite the focus of Entente policy pivoting to Europe, Japan was still minding its own interests as the leader of the Sphere, inking a deal with the Philippines to build a Japanese naval base in that archipelago. The Japanese did not necessarily need the base, but there was widespread political support for the idea of drawing the Philippines into the Sphere through diplomatic and economic maneuvers.

news11.jpg


Six new aircraft carriers were commissioned in May of 1940, giving the Imperial Japanese Navy almost the same number of carriers as the Republican Navy.

news12.jpg


The Imperial Japanese Navy began to deploy squadrons to the Gulf of Mexico, keeping them somewhat sheltered from the Republican Navy. The first group to go was a squadron of cruisers. The carrier and battleship fleets would follow in time. There were still operations ongoing on the Indian and Pacific Oceans, but once those were completed, then the majority of the IJN was likely to end up in the Atlantic.

news13.jpg


One arm of the Navy that could begin its Atlantic operations as soon as possible was the submarine arm, which was allowed to base in Dakar, giving it an excellent base from which to operate against Internationale trade with its partners in Latin America.

news14.jpg


news15.jpg


Never wanting to be totally edged out by the IJN, the Imperial Japanese Army secured funding for a major building program. Specifically, they sought to build powerful divisions of medium tanks and motorized infantry that would be even more rapid than the cavalry that had been used to great effect thus far.

~*~*~

STRATEGY VOTE: Africa

Mittelafrika had declared itself neutral in the war in between the Entente and Mitteleuropa, an arrangement that was clearly farcical, but one that the South African Federation and National France both respected for convenience.

africa01.jpg


This situation changed when the German Empire sought a place from which to operate their government in exile. They chose their largest colony by a wide margin, Mittelafrika.

africa02.jpg


Our two allies in Africa have no choice now but to recognize a state of war with the German colonies in Africa.

africa04.jpg


In addition, the Internationale, eager for a new front in the global revolution, has chosen Africa as their target.

africa05.jpg


The Internationale has decided to fund socialist revolutionary groups all over Africa, including in our two allies.

africa06.jpg


africa07.jpg


Our allies in Africa have conducted themselves well so far in their conflict against the Germans, but it is unknown if they will be able to handle the dual strains of war in Central Africa and the Internationale plan to engineer a wave of socialist revolution across the continent.

africa08.jpg


Hopefully, the Germans will fall before there is too much trouble from the syndicalist efforts, and both of our allies have made great progress so far.

africa09.jpg


Nevertheless, the option always remains for troops newly freed up from the victory in India to be sent to Africa.

africa10.jpg


We could send an expeditionary force to South Africa or National France or both in order to bolster their defenses against potential socialist troubles, or we could use these forces to invade East Africa ourselves, carving out our own sphere of influence on the continent. Or we could listen to the vocal minority which decries any Japanese involvement in Africa as a betrayal of the Sphere’s professed anti-colonial principles.

Option A: Assist the National French

All twelve divisions will be sent to French West Africa, where they will be used to guard against potential socialist revolutions in Guinea.

”Algeria is the best base we have for an invasion of Europe, and so we would do our best to defend it from the scheming of the socialists.” - Hidesuke Kamimura, IJA Officer


Option B: Assist the South Africans

All twelve divisions will be sent to South Africa, where they will guard against potential socialist revolution by the France-supported ANC and to fight Mittelafrika.

”The French nationalists are, unfortunately, an unsavory and authoritarian lot. We ought to be helping the South Africans gain more territory before we help the French.” - Kaishou Yokoyama, Minseito member of the Diet


Option C: Assist Both

Six divisions will be sent to each area for the same purposes.

”There is enough to go around, I think. Both of our allies have fairly large well-equipped militaries and should not require too much help from us to be able to hold the continent.” - Takushi Sakuma, IJA Officer


Option D: Invade East Africa

The twelve divisions will be used to land in Kenya.

”So many Japanese have this idea that Africa is inherently a European sphere. Europe is in shambles, Europe is a wreck! The Sphere has just as much a right to influence in Africa as Europeans, whether they be exiles or settlers.” - Dai Tanikawa, Seiyukai member of the Diet


”The Taishuto are not wrong when they complain about the discrimination present in both National France and South Africa. Why not establish a model African republic in the east and see what happens when we let the Africans rule themselves for once? We have good relations with Ethiopia, and I do not see any reason why we wouldn’t be able to establish good trade with an East African state. Of course, we would need to liberate the territory first.” - Kouichi Miyanohara, Minseito member of the Diet


Option E: Stay Out of Africa

The twelve divisions will be staged in North America for the planned invasion of Britain. This option does not mean that Africa won’t be used as a staging ground for future operations, but that Japan will not participate in the invasion of German Africa.

”You call yourselves liberals and democrats?! You got the entire Sphere riled up to throw out the German colonizer and now you want them to go die to exploit Africa?! Hypocrisy! Stay out of Africa, let the Europeans die for their own plunder!” - Yukana Furutani, Taishuto member of the Diet
 
D: invade Kenya.

Also why does Narva belong to Latvia?There have nevere been any latvians living there. Something borked in the release scripts?

 
Perhaps but when I looked a few months later, Estonia owned it. Could be that the event gave the wrong province to Latvia but then Latvia traded it to Estonia because its an Estonian core and not a Latvian one.

Kaiserreich has an unfathomable amount of events and they're often riddled with bugs and fuckups.

 
Part Fifteen: Kenya Give Me A Hand, Canada? (June 1 – September 4, 1940)

Part of Mackenzie King had always known that admitting Japan into the Entente would result in Japan overtaking Canada as the de facto leader as the Entente. Even if Japan had been the desperate one when the decision was made, finding itself in a war against Germany and Qing China, King knew that Japan was going to win in Asia. What he did not know was how close his own nation would come to falling to the syndicalist menace. The timely intervention of Japanese forces in both India and North America had prevented the second and third most important members of the alliance falling to the Internationale, and it had brought the industrial might and the tremendous resources of most of North America into the fold. For the rest of the leadership of the British Empire in Exile, it was more of a bitter pill to swallow.

01.jpg


However, King’s popularity had grown every time that his pro-Japanese foreign policy worked out for Canada. It was hard for any of his political rivals to complain about Japan when images spread through the press of the Japanese liberating Halifax and putting an end to the nightmare of the Nova Scotians. There were many racists in the Imperial command structure, but they were all forced to admit, however begrudgingly, that they needed the Japanese. And so, when the Imperial Japanese Navy made it clear that there would be no invasion of Britain unless the Royal Navy was put under an umbrella command led by Admiral Isoroku Yamamoto, King acquiesced without much consideration. The time for imperial rivalry was long past, the fight to preserve liberalism against socialism was well underway. Canada would stand behind Japan until the bitter end.

02.jpg


Yamamoto’s first directive was to pull the Royal Navy back from its base of operations in Newfoundland. The Royal Navy had three major naval bases on the Atlantic: Halifax, St. John’s and Quebec City. The base in Halifax had been levelled by the British in the days before their surrender, and the base in St. John’s had been a target of frequent British carrier raids. Quebec was the largest and most intact of the three.

03.jpg


The Imperial Japanese Army similarly acquiesced to the leadership of Admiral Yamamoto. The war against China and in India had been largely an Army affair, and obviously a war against Britain was to be a naval affair. While Japanese ground forces marshalled in Nova Scotia, both the Navy and Army Air Services sent squadrons to Canada.

04.jpg


The next British raid on St. John’s found the Royal Navy there more mobilized and determined than before, and dozens of British planes were shot down, at the cost of no Canadian lives or ships.

05.jpg


The British were smart enough to recognize that something was going on, and so they stuck around the area. Four light cruisers and two destroyer groups had fallen behind the main body of the Canadian fleet and were beset by the Republican Navy.

06.jpg


The main body of the Royal Navy, which had just arrived in Quebec, scrambled at the opportunity. The Republican fleet had been located, and there was only limited time until they obliterated all the Royal cruisers and disappeared again.

07.jpg


The Republican Navy flotilla, too consumed by their desire to sink the stragglers, did not detect the approaching Royal armada until Royal bombers ambushed the RNS Formidable. The surprised Republican flotilla was already beginning to steam away when one of the last Royal bombers in the attacking wave got in a tremendous hit, igniting the bomb storage on the Formidable and sending it directly to the bottom of the sea. The engagement had cost the Royal Navy two cruisers and eight destroyers, but the sinking of a British carrier was a great success.

08.jpg


Not wanting to be outdone by the Royal Navy, the Imperial Japanese Navy Service scrambled its land-based bombers from Newfoundland.

09.jpg


With the British carriers’ air wings badly damaged from the failed raid on St. John’s and the sinking of the Formidable, the second attack also took the British by surprise. They had never accounted for Japanese naval or air assets in this theater before.

10.jpg


The Japanese attack was even more devastating. The Victorious, which had been hit by two Royal bombs during the battle with the Canadians, was sunk by Japanese dive bombers, and the battleships Hercules and Agincourt as well as the heavy cruiser Edinburgh were also sunk. The Republican Navy had lost two carriers, two battleships, a heavy cruiser and thousands of lives while managing to sink just two light cruisers and eight destroyers while downing a handful of Japanese planes. The British public, already angered by the disaster in Nova Scotia, was now beginning to panic that the Republican Navy, which was supposed to provide an impenetrable defense for the homeland, was faltering in its duty.

11.jpg


The victories silenced any apprehension about the Canadians joining the Sphere command structure, and it provided political cover for the Japanese to invade East Africa. South Africa and National France had been assuming they would divide the center of Africa amongst themselves, but they did not even know that a Japanese squadron was departing Burma towards Mombasa. This was going to complicate their ambitions significantly.

12.jpg


The Republican Navy was smarting, and so the Imperial Japanese Navy set about a more aggressive strategy. Internationale commerce raiders had been wreaking havoc in the Caribbean more or less unchecked for months, and so a Japanese cruiser squadron based out of New Orleans was tasked with clearing them out.

13.jpg


The squadron sunk destroyers and cruisers from Britain, France and the Netherlands, reducing their ability to harass shipping traffic headed for the Panama Canal.

14.jpg


Unfortunately, these victories further incensed the Republican Navy. British pride had been harmed severely by the losses near Newfoundland, and so they set out to exact revenge against the Entente.

15.jpg


A second British carrier fleet ambushed the Japanese cruiser squadron halfway between the Panama Canal and Hispaniola, and utterly obliterated it. The Japanese cruisers, accustomed to patrol duties and hunting down lone enemy destroyers and cruisers, were completely unprepared for the swarms of British planes that descended upon them. Twenty three vessels were sunk and sixteen thousand sailors were killed in just a few days.

16.jpg


The news of the horrific loss completely swamped news of the Japanese landings in Kenya, something that the government hoped would be good for morale.

17.jpg


The loss of so many men demanded further vengeance, and the largest fleet of the Imperial Japanese Navy, which contained all of its carriers, was tasked with carrying it out.

18.jpg


Fierce air battles led to great losses on both sides, but only the Japanese were able to pierce the enemy’s air screens and actually sink enemy vessels. The carrier Ludd, whose planes had sunk more of the lost cruisers than any other British vessel, was downed as well as the battlecruiser Thistlewood.

19.jpg


The Japanese were not satisfied with just two enemy ships. They continued to pursue the enemy, even though a number of their own carriers were damaged and their aircrews exhausted by the battles with the British pilots.

20.jpg


The second engagement between the two fleets resulted in another bloody air battle but still no Japanese ship losses. The British instead lost the battlecruisers Tiger and Indomitable and most importantly the carrier Lilburne.

21.jpg


The Japanese, encouraged by the kill/loss ratios they had achieved and the sinking of two enemy carriers, decided to be aggressive and continue the pursuit. However, the British fleet managed to slip away, and the Japanese instead came across an unfortunate Dutch destroyer group.

22.jpg


The four destroyers were bombed into oblivion.

23.jpg


The Japanese had killed two all-important British carriers but it did not feel like true vengeance had been exacted on behalf of the sixteen thousand dead Japanese sailors. However, the British fleet was gone, and further pursuit into the Atlantic itself was unwise. The Japanese Navy sailed towards Norfolk for repairs.

24.jpg


Thousands of miles away, the IJA had successfully carried out its landings and captured Mombasa.

25.jpg


The twelve Japanese divisions outnumbered the German light infantry in the region by a significant factor, and so the army split up and began to fan out.

26.jpg


Half of the force was directed south towards Dar es Salaam, the administrative center of the German colony in Africa. Capturing the city was important not only for the purpose of cutting the head off of the remaining German forces, but to secure a port for Japanese use.

27.jpg


28.jpg


28a.jpg


The infrastructure of the area was poor and served as more of an impediment to Japanese advance than the actual German enemy did but nevertheless the Japanese had secured the coast of Kenya and the capital of Dar es Salaam in a month.

29.jpg


There was an unspoken race between the French exiles and Japanese now to secure more of the German colony, and the Japanese got a bit of a boost in this race as a mainland France-supported socialist rebellion broke out across Mali and Senegal.

30.jpg


Africa was still a secondary front at the moment, however, as hundreds of thousands of Japanese troops marshalled in Nova Scotia. The location was appropriate, as in the wake of the recapture of Nova Scotia, Canadian forces had elected to maintain a state of martial law in the province in order to “root out British stay-behinds”.

31.jpg


In fact, this was intended to make it more difficult for enemy spies to realize that such a large Japanese force was marshalling in the area. Their goal was, of course, Britain, but it was a long way to Britain and so it was deemed necessary to invade and liberate their old ally in Iceland, which had been under the control of a British puppet regime since the British invaded the island in the opening weeks of the Interntionale-Entente conflict.

32.jpg


In the cover of darkness, one of the largest armadas in history departed from the Gulf of St. Lawrence. It contained all of the Canadian and Japanese carriers.

33.jpg


As it steamed to the northeast, the Japanese battleship squadron broke away and moved towards Iceland. There was no intelligence on what resistance they would find, as it was deemed more important to maintain the element of surprise than to scout the area and arouse enemy suspicion.

34.jpg


The rest of the armada broke due east, aiming to establish a screen that would intercept any Internationale fleets that might interfere with the operation in Iceland. Instead they came across just a handful of vessels patrolling for Entente submarines.

35.jpg


Unfortunately, the vessels managed to get away.

36.jpg


Yamamoto elected to turn this failure to sink the enemy vessels into a feint, and have the Royal Navy, with the Imperial Japanese Navy not far behind, steam towards the British Isles as to make the British think they were going to attempt a carrier raid on their own ports.

37.jpg


The feints and distractions proved unnecessary, as the Republican Navy mostly stayed in port. A small British squadron protecting Iceland was blown to pieces by the big guns of the Japanese battleships.

38.jpg


The Japanese infantry landed in Iceland with no resistance.

39.jpg


40.jpg


Welcomed as liberators, the Japanese quickly arrested the British puppets in Reykjavik and proclaimed that the former government was restored. While the former government had de jure authority, the island was under de facto Japanese military administration.

41.jpg


Having endured months of starvation due to being the lowest priority for Internationale food shipments, the Icelandic population was overjoyed when Admiral Yamamoto announced that there would be lots of food and lots of construction jobs for Icelanders. He did not, of course, announce specifics of his plans for the island, but he envisioned Iceland as an impregnable unsinkable aircraft carrier in the North Atlantic. It was still a long way to Britain, but Iceland would be the way to secure the North Atlantic sea route to Britain.

~*~*~

Japanese Headlines During the Summer of 1940

news01.jpg


Elections Conclude in Vietnam and Laos

news02.jpg


news03.jpg


Italian Federation Falls to Internationale, Pope in Exile in Spain

news04.jpg


Angola Revolts Against Portuguese Rule

news05.jpg


Australasia Occupies East Timor

news06.jpg


Last of German Forces on New Guinea Surrender

news07.jpg


Enrollments in University Science Programs Double as Companies Pay Large Salaries

news08.jpg


Ukraine Falls to Internationale

 
Part Sixteen: Algiers-sus Christ!! (September 5 – November 24, 1940)

001.jpg


The Entente armada, rather than pulling back to home port after escorting the invasion of Iceland, decided to sail further east, encountering patrols off the Scottish coast.

002.jpg


03.jpg


04.jpg


The massive armada would spend the next few days seeking out and sinking patrolling destroyers and cruisers.

05.jpg


Seeking a morale victory more than anything else, the armada sailed to surround Scapa Flow and sunk more destroyers, though it refrained from raiding the port itself. The Republican Navy had recently upgraded its ciphers and so the Entente was in the dark about the forces present in Scapa Flow.

06.jpg


11.jpg


The Republican Navy had been relegated to the kind of submarine warfare in the Atlantic which the German Navy had been relegated to during its days of being outmatched on the seas in the Great War. Only the British submarines seemed to be able to evade the Japanese land-based bombers that established a safe zone around Newfoundland.

07.jpg


A handful of destroyers had managed to flee into port in the Hebrides, and so the Entente armada, more so to frighten the British, raided the port of Stornoway.

08.jpg


The British command was in a panic about if an invasion was imminent, and if the operations in Scotland were a feint. This was the primary goal of the raids, as it caused the Republican Navy to stay in port in order to counteract any potential invasion. In reality, the Japanese were not prepared to invade just yet, but if the British stayed in port, it would make it easier for the Japanese to transport Sphere forces from Asia to America, and then from America to the staging point in Iceland.

09.jpg


The secondary objective of the raids was for reconnaissance. As the armada chased some French destroyers near Ireland, they made a point of examining Irish coastal defenses.

10.jpg


Ireland was in a state of war with both the Entente and Internationale, and stubbornly refused to negotiate with Japan, believing that Japan would reestablish the rule of the exiled Royals in Ireland as soon as Irish forces stood down. Thus, it was an idea in the Entente high command to invade Ireland first and then use the airbases in Ireland to wage an air war against Britain. However, the scouts found the defenses of Ireland to be perhaps stouter than those of Britain. As Britain had lost a majority of its army and nearly all of its veterans in the failed American adventures, they had less forces to cover a longer coast than the Irish.

12.jpg


13.jpg


A final move for the Japanese in the North Atlantic was to invade Greenland. Greenland had barely any facilities that would pose a strategic threat to the sea lanes to Iceland and Britain, but it did have minor economic value to Denmark, a French puppet, and so the Japanese landed forces on the island and deposed the small group of socialists running the Internationale’s overseas outpost. Japan would not leave any forces to defend the island, instead transferring the occupation force to Iceland in preparation for the invasion of Britain. The chances of rebellion were low, and denying resources to the Internationale was much more important than securing resources for the Entente.

~*~*~

a01.jpg


While the Sphere command was consumed with preparations for an invasion of Britain, the Imperial Japanese Army, in cooperation with the South African Army, continued their slow and methodical attack into the inland of Mittelafrika.

a02.jpg


The German Empire, bereft of their homeland and surrounded on all sides, could not mount much of a resistance. Their colonial forces consisted primarily of light infantry used to putting down colonial disturbances, while the Entente fielded veteran infantry units and even an armored division.

a03.jpg


The armor was not up to the standard of the latest French designs or even the Japanese designs still being produced, but it had considerable shock value against the underequipped German colonials.

a04.jpg


a05.jpg


The African front was a low priority, and so the goal for Japan was to secure enough territory in order to guarantee Japan a seat at the table when it came time to negotiate what would happen with all of this German territory.

a06.jpg


a07.jpg


Japan secured the entire perimeter of Lake Victoria, a success given the fact that no mobile assets were sent to Africa. Sakai’s doctrines stressed the importance of outmaneuvering one’s enemies in battle, but when it came to the Japanese in Africa, it was going to end up being more important how they outmaneuvered their allies in diplomacy.

~*~*~

azerbaijan.jpg


belarus.jpg


dku.jpg


ukraine.jpg


The Internationale was proceeding through Mitteleuropa’s frontiers quickly, and so they began to accelerate their efforts to spread rebellion across Africa.

angola.jpg


mozambique.jpg


Unfortunately for the socialist cause, they were lackadaisical about coordinating the uprisings. While a Mozambican uprising put pressure on Portugal, it came too late to give breathing room to the Angolan revolution.

sahel.jpg


http://lpix.org/2914516/algeria.jpg[/img]

Similarly, while the Sahelian revolution was floundering, the FLN began their uprising in the heartland of National France. The Algerian uprising was the most serious yet, but it came too late to help the Sahelian uprising.

subs.jpg


The troubles of National France did not trouble the Sphere command, but unfortunately the FLN had declared their uprising against National France and the “foreign capitalists who support them”, later naming Japan by name in their manifesto. This specific threat was too much to ignore, and so Japan found itself in a state of war with the new Algerian state, even if the entire Shakai Taishuto and a significant portion of the Minseito would have been happy to let the National French suffer the consequences of their colonialism. And so the Japanese government ended up in a state of war with the FLN in Algeria. However, because the Minseito was split regarding the issue

STRATEGY VOTE

PROBLEM: Instead, all eyes were on Britain.

iceland.jpg


The naval successes of the IJN against the Republican Navy allowed Japan to invade Iceland, and a large invasion force was staged there.

britain.jpg


Sphere command knew, due to scouting reports and intelligence estimates, that the size of the invasion force was likely much larger than the remaining Republican divisions, and probably comprised of more experienced and capable soldiers.

frozenengland.jpg


With the status of Algeria in question and the National French in general having been an unreliable and unstable ally, it was unknown if the Japanese could depend upon any part of Africa within range of Europe as a base from which to operate against the Internationale. East Africa was under control, certainly, but it was quite far from Europe.

Thus, the question arose if, given the weakened state of the Republican armed forces and the loss of Algeria as a base, the Sphere should invade Britain ahead of schedule. The target area for the invasion, the area between Liverpool and Blackpool, was in the midst of winter, but it was lightly defended and likely would not hold up against the experienced Japanese marines.

Option A: Climb Mount Tate! (Invade ASAP)

”The British are as weak as they will ever be! We have killed and captured many, but their industry is intact and the resources of the continent still supply them. We must pounce before they recover.” - Masatoshi Takeda, IJN Officer


Option B: Stay at Base Camp (Wait Until Thaw)

”We are not talking about a delay of a year, we are only talking about waiting until early spring! Do not put our soldiers in a position they do not need to be in. The British will not magically find hundreds of thousands of able bodied men to arm and train in that short a period of time. We should wait.” - Riku Sakurai, IJN Officer
 
Part Seventeen: Osaka Beach (November 28, 1940 – February 18, 1941)

001.jpg


The Entente armada departed Canada to escort an invasion once again.

002.jpg


Eager to maintain the element of surprise as much as possible, the Imperial Japanese Navy Air Service sought to drive away patrols from the path of the armada.

003.jpg


It did manage to scare away the Dutch Navy after sinking a number of their destroyers.

004.jpg


However, there was nothing to be done about what did come upon the armada. The main body of the Republican Navy encountered the Royal Navy a few hundred miles south of Iceland.

005.jpg


Both sides launched sorties, but when the Imperial Japanese Navy arrived, the Republican Navy command began to understand that something large was afoot and pulled back towards Britain.

006.jpg


The armada, having been discovered, regrouped so that all of its carriers could stay within range of one another.

007.jpg


The armada then gave chase to the Republican Navy. No invasion could take place unless it was neutralized or contained.

008.jpg


The Republican Navy struck a blow by sinking the Canadian cruiser the Hawkins but the Royal Navy struck back by sinking an all-important Republican carrier, the Internationale.

009.jpg


010.jpg


Once the Imperial Japanese Navy caught up to the action, Japanese pilots sunk the carrier Indefatigable and the battleship Naseby.

011.jpg


The Republican Navy then managed to get out of range and escape to their main port in Scapa Flow, which was then blockaded and surrounded by the Royal Navy.

012.jpg


As the Imperial Japanese Navy arrived to shore up the blockade, British land based bombers began to attack the armada.

013.jpg


The carrier Akagi and battlecruiser Kirishima were sunk.

014.jpg


Meanwhile, the battleship squadron of the IJN sailed into the English Channel, seeking a good invasion site, as storms were present over Manchester.

015.jpg


After sinking a number of cruisers and destroyers, the battleship squadron reported back that Cornwall was isolated and lightly defended, even though it had coastal fortifications that other shorelines in Britain did not. It did, being somewhat further south than Scotland, enjoy a bit more sunlight, which was a main reason, along with rough terrain, why Scotland was bypassed in favor of England as a target.

016.jpg


On a chilly December day, the invasion began.

018.jpg


Since the disaster in Canada and the loss of many carriers, the British homeland had been preparing to be attacked. However, it seemed obvious to everybody that such an attack would occur in the summer, and so the attack in the winter caught the British by surprise. The appearance of Japanese marines on the coast of Cornwall and Devon was, despite the warnings, a complete shock to the British population, especially as the victory over Germany had lulled the population into a kind of complacence. Europe was socialist, and faraway Japan, despite all its victories, couldn’t do anything about that. If the capture of Iceland had made the Britons nervous, then the landings made them panic.

019.jpg


The Republican Navy had also assumed that any invasion would come in the summer, and when faced with the Entente armada, it seemed more likely that it was intended to destroy British vessels than to escort an invasion. When the news of the landings came, the admirals decided that the Navy, battered by the Entente over the last year, had only one chance to disrupt the landings and save Europe.

020.jpg


They did not make it more than fifty miles from Scapa Flow before they were set upon. Three carriers and three battleships were sunk in one day.

021.jpg


022.jpg


With the landings well underway, the Entente armada decided to move south to defend them in case the Communal Navy attempted to disrupt it. However, one of the Royal Navy squadrons lagged behind hoping to catch the British trying to sneak out. Two battlecruisers, two battleships and another carrier were sunk, in what was termed in the North American papers as the Scottish Duck Hunt, a reference to how easily the Entente seemed to be able to sink enemy vessels without taking many losses themselves.

023.jpg


The trend continued further south, as the Japanese sunk two battleships while taking no losses.

024.jpg


While the British were being ravaged on the sea, they were holding up on land. The first enemy reinforcements arrived in the form of a poorly trained garrison unit redeployed from Kent.

025.jpg


026.jpg


Before long, the Japanese found themselves facing a force six times as large as what initially inhabited Cornwall and Devon, including two actual infantry divisions.

027.jpg


At this point, Republican Navy commanders were consciously sacrificing their vessels in trying to charge the landings and disrupt them long enough for heavy reinforcements to arrive and defeat the Japanese.

028.jpg


At first, only a handful of cruisers attempted the job, but soon whole Republican squadrons were sailing into the area making a nuisance of themselves, heeding the call from the Republican Army for just a little more time to shore up the defenses and throw the Japanese back into the sea.

029.jpg


030.jpg


Time for the Army was purchased at a steep cost, with scores of British ships, including another carrier, being sunk as they approached the landing sites.

031.jpg


032.jpg


Only destroyers and small cruisers were attempting it before long, a fact that the Japanese took to mean that the Republicans had lost most of their capital ships. The Republican Navy had given the Army as much time as it could.

033.jpg


It wasn’t enough. After six weeks of grueling battle on the beaches and towns of Cornwall in the middle of winter, the Japanese had secured the port of Plymouth.

034.jpg


035.jpg


The Imperial Japanese Army immediately moved to reinforce the beachhead, with thirty five divisions present within two weeks. To the east, British divisions poured in from across the nation to establish a defensive line. The Japanese, once recovered, would likely be able to overpower the depleted Republican Army. But the Entente had uncontested naval supremacy for the first time, and nowhere in Britain was safe now.

VOTE: Japanese General Election 1941

PROBLEM: The four year term of the diet elected in 1937 is up, and it is time to decide which of the parties will lead Japan for the next four years. Due to the split of the Seiyukai and the rising popularity of the Shakai Taishuto, it is possible for any of the four major parties to end up with a plurality and thus a dominating role in the government. Which party wins will have an effect on how Japan might interact with its allies and enemies, and so the Emperor would be wise to exert his influence in favor of a certain party. Which party is the best choice is up to the Shadow Council.

Option A: Reelect the Minseito (Liberals)

Foreign policy notes: The Minseito is enthusiastic in its support for the Entente and international liberalism and genuinely seeks fair dealings with the allies that it views as Japan’s partners, especially Canada. The growing consensus within the party is in favor of phasing out of the old style of colonialism in favor of paternalistic relationships such as that between Japan and Korea. The Minseito is generally opposed to Russia’s political system and committed to destroying the Internationale.

”The Minseito has led Japan to great victories in this conflict, and we implore you to stick with us for the next four years to see us through to true peace!” – Ukagi Kuzushige, Prime Minister of Japan


Option B: Elect the Seiyukai (Conservatives)

Foreign policy notes: The Seiyukai is as committed to destroying the Internationale as the Minseito, but is suspicious of Canada and believes Japan should be a clear number one and serve its own interests above that of the British Empire. The Seiyukai finds Russia distasteful but not necessarily an enemy and believes that colonialism in the traditional sense is best.

”National unity is of course important during these trying times, but we worry about the Minseito’s willingness to drain Japan’s resource in furtherance of Canadian goals. Japan must always come first.” – Yoshizawa Kenkichi, aspirant to the Prime Ministership


Option C: Elect the Kokumin Domei (Nationalists)

Foreign policy notes: The far right Kokumin Domei believe in Japanese supremacy in a way that makes the Seiyukai blush slightly. They reject the liberalism of the Entente but understand their necessity as allies against the Internationale. They do not have any issue with Russia though they would not be opposed to expanding the Japanese sphere of influence at their expense. They would want to ignore the other members of the Entente and serve Japanese needs only.

”The scourge of syndicalism may have been thrown from North America, but if we are not vigilant, it will come up and destroy us here in our own homeland. The Minseito’s weakness puts us all at risk.” – Kanemitsu Tsuneo, aspirant to the Prime Ministership


Option D: Elect the Shakai Taishuto (Socialists)

Foreign policy notes: The Shakai Taishuto is a diverse bunch but has mostly coalesced around the brand of democratic leftism embraced by the republicans in China, seeking to nationalize various industries and enact sweeping reforms while shying away from the complete restructuring of the economy and society advanced by the European syndicalists and totalists. They are ardently anti-colonial, and would seek to end all of the inequal arrangements between Japan and its puppet states in the Sphere. They are vehemently opposed to Russia and believe that talks of an Entente invasion of the European continent are unrealistic and impractical and that peace should be negotiated after the British campaign concludes.

”The war has gone on for a long time, and while our soldiers have won us many victories, I do not think that endless war in Europe is in the best interest of the Japanese workingman. Our focus should be peace and prosperity for the Japanese worker, and indeed for the Asian worker.” – Abe Iso, aspirant to the Prime Ministership


(None of these options would have direct consequences beyond which party is in control, but choices in future votes will change based on what the range of plausible choices for the victorious party would be.)

 
Last edited by a moderator:
Part Eighteen: Dengekisen (February 21 – May 16, 1941)

001.jpg


In the final days before the election, the Emperor announced that he would honor a few members of the Minseito government, in a maneuver intended by the Shadow Council to whip up feelings of patriotic wartime loyalty to the current government. It worked, and the Minseito came away with its largest margin of victory in history. In a distant second place was the Shakai Taishuto, who won votes with their promises of comprehensive social and economic reform, and following just behind them were the Domei and Seiyukai. The result was that the liberals had carte blanche to implement their policy, though internal divisions in the party would sometimes result in partnerships with the Seiyukai or Taishuto to make up the difference.

002.jpg


006.jpg


The Minseito had hoped that the final surrender of the German Empire would come before the election and provide a boost, but were irritated to find that the Germans refused the offer to officially surrender to the Entente and instead merely dissolved in what was an effective capitulation to the Internationale. German units disbanded and the Commune of France claimed temporary jurisdiction over Germany’s colonies while it made preparations to “fully liberate” them. In reality, they had little hope of moving forces outside of Europe with the Entente’s naval dominance, but the maneuver meant that the Entente would need to spend time occupying the territory in question.

003.jpg


The German High Seas Fleet, or what was left of it, also refused an offer to surrender to the Entente and instead fled to Ireland, straining the island’s limited resources.

004.jpg


005.jpg


In a few short months, Ireland would be the sole surviving member of the Mitteleuropa alliance, and would continue to fight on despite the hopelessness of its war with both the Entente and Internationale.

007.jpg


The situation of the German High Seas Fleet sailing under the Irish flag was unexpected to say the least, and the Imperial Japanese Navy elected to allow the Irish fleet to engage in stunts near Ireland and waste the time of British land-based bombers which had been hunting Entente vessels since the fall of Germany proper and the flight of the High Seas Fleet to Africa.

012.jpg


008.jpg


The election, the final surrender of Germany, the fall of Persia to the Arab bloc and the bizarre appearance of the Irish High Seas Fleet almost pushed the fact that Japanese forces were occupying part of England out of the mainstream news, as the invasion had stalled along a heavily fortified battle line in Devon. The initial invasion force was quickly outnumbered by the marshalling Republican Army, but then the appearance of the Japanese divisions marshalled in Iceland gave the advantage to the Japanese once again. However, there was not such an overwhelming amount of superiority to make the IJA comfortable with attacking head-on. The arrival of a Manchurian Corps, and more importantly, the arrival of six motorized divisions and two armored divisions, tipped the scales definitively in the favor of the Japanese.

010.jpg


This evolving situation created a stalemate, leading some in the Internationale to believe that the Japanese had only intended to seize a port in England just to demonstrate that they could in order to force peace talks. However, no offer of peace talks came, and in fact the Sphere was merely waiting for the weather to clear.

011.jpg


The Japanese battleship squadron that had returned to North America to rearm and repair returned in early April, losing one battleship to extremely brash destroyers which were aggressive in their attempts to fire torpedoes, perhaps knowing that they were doomed and would do well to take down enemy ships before going under.

013.jpg


014.jpg


No amount of bravery on the part of the Republican Navy could change the facts about the situation on the seas, however, and the Japanese were plenty able to launch two separate amphibious assaults, one near Portsmouth and another on the southern shore of Wales.

015.jpg


A lone infantry division attempting to join the main body of the Republican Army in Devon was attacked by the Marines in Portsmouth.

016.jpg


Unlike the landing in Cornwall, this landing caught the enemy unprepared and disorganized, and it was effectively in just a few days.

017.jpg


The landing in Cardiff was virtually unopposed, and so the new situation became far more precarious for the British. Twelve cavalry divisions were present in southern Wales, seven in Hampshire, and the elite Japanese Marines in a position to strike London itself. The British defense in Exeter suddenly found itself surrounded, and abandoned its fortifications to attempt retreat to Bristol.

018.jpg


The 35 divisions left behind in Cornwall, including the armor and motorized divisions, attacking the retreating British infantry.

019.jpg


020.jpg


The operation looked to be a success in the early stages, but it cost the Japanese another battleship. While the focus had undeniably shifted to carriers, the battleships were still a great source of national pride and their sinking meant a great loss of life in most instances.

021.jpg


The loss of one battleship and some destroyers was offset by the surrender of over sixty thousand British troops who found themselves unable to flee the Japanese armor.

022.jpg


Before the Japanese secured Devon, the forces which had landed in Hampshire and southern Wales launched an attack on Bristol, hoping to cut off the retreating British and also link up the three separate Japanese pockets on Great Britain into one continuous area of supply.

023.jpg


The Japanese cavalry was not quick enough to prevent the Republican Army from making it to Bristol.

024.jpg


However, the British hopes of establishing a stout defense in Bristol were dashed, as the Japanese armor and cavalry were upon them before they could properly dig in. The result would be the fourth and final of the “disasters” for the Republican military: the disaster of the lost divisions in Canada, the trouncing of the Republican Navy off of Newfoundland, the obliteration of the Republican Navy in the North Sea, and finally what amounted to the capitulation of the Republican Army in Bristol, and the end of socialist Britain.

025.jpg


The diehards continued to fight on despite having very little hope of even slowing the Japanese.

026.jpg


Within a week after the disaster in Bristol, all of Wales was under control and Japanese cavalry was assaulting Norwich, aiming to cut off London from the rest of Britain.

027.jpg


In the south, the Japanese Marines were attacking Dover, hoping to capture the most obvious port to which France might send reinforcements.

028.jpg


Once Dover was captured, London was surrounded and then assaulted.

029.jpg


Encircled and with their morale utterly shattered by months of defeat, the defenders of London surrendered within a few days.

030.jpg


With the capital under control and the central government fleeing to Paris, the Japanese had a vain hope that the entire Republican Army would surrender, but instead they found an enemy continuing to fight on in the face of overwhelming force.

031.jpg


It would later be discovered that the British hoped to endure in Scotland long enough for French help to arrive, but most of the remaining British military strength were local garrison units which were unwilling to leave their home areas.

032.jpg


One by one, the storied units which had taken part in the initial British revolution quickly surrendered to the rapid advance of the Japanese.

033.jpg


After the capture of Manchester, the slower infantry were tasked with staying behind and managing the population of England, while the more mobile cavalry and armor would attack north.

034.jpg


It became clear quickly that the Japanese needed to seize the two major cities of Scotland: Edinburgh and Glasgow, the latter of which was perhaps the most enthusiastically socialist city in Britain.

035.jpg


The Japanese armor, led by the originator of Japanese armor theory, Koji Sakai, charged north.

036.jpg


037.jpg


To Sakai’s chagrin, the motorized divisions actually beat him to their goal, but the Japanese press was far more impressed with the images of the imposing Japanese armor riding into Edinburgh and so Sakai’s fame grew the most.

038.jpg


039.jpg


Indeed, Koji Sakai, distrusted after being implicated in the military plot against the Minseito government, was redeemed in the eyes of the public. The IJA had, in a little under five weeks, captured the whole of Britain from a starting point of only occupying Cornwall. His theories, already proven correct by the French destruction of Germany, could not be denied any longer. Dengekisen was the way of the future.

Information About the Conference System

This game I have an interesting dilemma in terms of narrative, Japan is not nearly big enough to take on France with its own military, but if I were to militarily control all of the Entente members I would probably be able to smash them. Therefore, I have decided to come up with a Conference System that will represent the internal politics in the Entente alliance as they try and cobble together a coalition that can defeat the Internationale on the Continent.

The way this system will operate is through reader votes on various issues, much in the manner of this side LP thus far. However, each choice will have consequences in so far that it will irritate or impress some of the nations in the Entente. Whether a nation is satisfied or annoyed by the sum of the choices Japan makes will either add or subtract to what will basically be an RPG dice rolling system. While in a tabletop RPG you might be critically hit at 2, hit between 3 and 6, grazed between 7 and 9 and block the attack between 10 and 12, in this system, die rolls will determine, based on a scale determined by what I determine to be their initial proclivity to help modified by the consequences of your choices, the extent to which they help Japan, or if they help at all.

So, for instance:

Nation A might have a base scale as follows, based on their relationship with Japan in game:

 2-3 Only send volunteers (no military control, they send what the AI decides to send and I don’t have control over what they do send)

4-5 Send a third of the army

6-8 Send half of the army

9-12 Send as much of the army as possible

Now if Japan makes a decision that pisses them off, this scale would shift in the proper direction to bias the dice roll towards not helping, and so the scale might be as follows:

2-5 / 6-7 / 8-10 / 11-12

I will not reveal the specific scales for each nation or the point values of decisions until the conferences conclude because the point of this is not to encourage you to treat this like a game. A decision might greatly please a small ally but slightly displease a large ally, and it’s up to you to balance those considerations based on the troop strength of the allies. Or you could always choose what you think is right and damn the consequences. It is up to you!

 
Planning the Invasion of Europe

france.jpg


With Britain now under Entente control, the focus of Entente war planning has now shifted towards an even more challenging task: the invasion of mainland Europe.

ententearmies.jpg


Ht3M59i.jpg


(The United Kingdom doesn’t exist yet, them showing up here is due to me tag switching to send everybody’s expeditionary forces back home so that there is an accurate representation of who has what.)

The combined might of the Entente is greater than that of France, but unfortunately the Entente is not as ideologically unified as the Internationale and its members have differing motivations. Not all even believe that the Entente should bother invading Europe. Therefore, it falls upon Japan to motivate the members of the Entente to contribute troops towards the invasion. Some members of the Entente are under the effective control of other members, and thus will follow the lead of those members when deciding how many troops to send.

The Sphere:

Japan, Korea, Fengtien Republic, Formosa, Transamur, Vietnam, Laos, Burma


Japan: 22 infantry, 25 cavalry, 9 motorized, 2 armored, 4 marines = 62 combat-ready divisions


8 Interceptor, 4 CAS, 4 Tactical Bomber, 4 Naval Bombers


Korea: 24 infantry, 2 militia = 26


Fengtien Republic: 17 infantry, 2 cavalry, 2 mountaineer, 2 militia = 23


Formosa: 6 infantry, 4 militia = 10


1 Interceptor, 3 CAS, 1 Tactical Bomber


Transamur: 6 infantry, 3 cavalry = 9 divisions


1 interceptor


Vietnam: 4 infantry


Laos: 2 militia


Burma: 2 infantry


Sphere totals:


81 infantry, 30 cavalry, 9 motorized, 2 armored, 4 marines, 10 militia, 2 mountaineer = 138 total


10 interceptors, 7 CAS, 5 tactical bombers, 4 naval bombers


The members of the Sphere, which consists of Japan and its puppets, will follow the lead of Japan anywhere, and so none of the decisions made during the conferences will affect their willingness to fight, provided they still exist at the conclusion of negotiations.

Canada:

New England, Cuba, and the Caribbean Federation will follow the lead of Canada.


Canada: 25 infantry, 3 cavalry, 1 armored, 4 marines = 33


7 Interceptor, 2 tactical bombers, 2 naval bombers


New England: 19 infantry, 4 motorized = 23


1 interceptor


Caribbean Federation: 1 infantry


Cuba: No land divisions


3 tactical bombers


Canada and friends totals:


45 infantry, 3 cavalry, 4 motorized, 1 armored, 4 marines = 57 total


8 interceptors, 5 tactical bombers, 2 naval bombers


Canada, Japan’s closest ally and ideological partner, feels an enormous debt of gratitude towards Japan for playing a decisive role in the war in North America and for putting an end to their long time enemy, the Union of Britain. Therefore, they have a very high base willingness to fight.

National France:

28 infantry, 3 cavalry, 3 motorized, 1 marine, 1 mountaineer, 1 militia = 37 total


4 tactical bombers


National France, the least democratic of all Entente members, has had a rocky relationship with Japan, as the liberal and socialist parties in Japan have a great and public distaste for their colonial nature. Japan has publicly refused to assist them against the native rebellions troubling them, and Japan’s invasion of East Africa has been taken as an aggressive encroachment of Japan upon a sphere of influence which the Algiers government regards as “theirs”. However, there are the most under threat from the Internationale, and so they still have a moderate base willingness to fight.

Republic of China:

27 infantry, 8 cavalry, 4 motorized = 39 total


18 interceptors


The Republic of China has the most left-wing government of any Entente state, and has the friendliest relationship with the Internationale, despite the official state of war that exists between the two alliances. The Chinese public is mostly unwilling to go to war in Europe, but there is a great demand for Chinese reunification to be completed, and so the Republic may be convinced to join into the war through various bribes and promises. Until then, however, they have a very low base willingness to fight.

Delhi:

Nepal and Sri Lanka will follow the lead of Delhi


Delhi: 11 infantry, 18 cavalry, 1 militia = 30


3 tactical bombers


Nepal: 3 infantry


Sri Lanka: 2 infantry


South Asia total: 16 infantry, 18 cavalry, 1 militia = 35 total


3 tactical bombers


Delhi has friendly relations with Canada and is generally supportive of the idea of liberating Europe, as they wish to see new export markets opened up for their many goods. However, they distrust Japan and believe that Japan is angling to dominate the rest of the Entente. Therefore, they have a moderate base willingness to fight.

Australasian Confederation:

18 infantry, 5 cavalry, 1 light armor, 1 militia = 25 total


6 naval bombers


The Australasian Confederation, much like Delhi, is supportive of liberating Europe, but they also mistrust Japanese motives and believe that Japan is trying to subsume Australasia into its Sphere, rather than treating Australasia as a partner. Therefore, they have a moderate base willingness to fight.

United States of America:

14 infantry, 2 militia = 16 total


15 CAS


The United States of America, like Canada, recognizes the importance of Japan in liberating them from the Internationale. However, they are eager to assert themselves as a great power once again and their populace is war weary and unconvinced of internationalism, and so they have a moderate base willingness to fight.

Pacific States of America:

15 infantry, 9 militia = 24


1 CAS, 2 tactical bombers


The Pacific States have the highest opinion of Japan of virtually anybody in the Entente, as Japan was the first nation to send them support when the Civil War broke out. However, the population has bought into the Pacific-centric philosophy of foreign policy, and do not generally wish to be involved in Europe. However, their liberal feelings are genuine and strong and combined with their loyalty to Japan, they have a high base willingness to fight.

South African Federation:

14 infantry, 1 light armored, 3 militia = 18 divisions


1 interceptor


The South African Federation has only recently decided to join the Entente and, like National France, is distrustful of Japan’s intentions in Africa. However, unlike National France, they have not a contentious public relationship with Japan, and so they have a moderate base willingness to fight.

Indonesia:

14 infantry, 1 cavalry = 15 divisions

Indonesia has found itself in a unique political situation at home. The Dutch exiles are eager to liberate the homeland, but the Indonesian population is not interested in European adventures. However, the Dutch exiles have made a pact with the representatives of the Indonesian population that if Indonesia raises armies to fight in Europe, the Dutch government-in-exile would grant Indonesia complete independence. Therefore, Indonesia has a high base willingness to fight.

CONFERENCE VOTE #1: Auxiliary Maneuvers

The Entente will not be prepared to launch an invasion of Europe until at least 1942, and so there is time for other wars aimed at securing the Entente’s position. In addition, Japan must decide whether or not to transfer control of Great Britain to Canada.

Vote #1: The British Question

PROBLEM: Japan has invaded and occupied Great Britain, and while Canada has stopped short of demanding we hand over the territory to them, they have assumed for a long time that we would, and they have been preparing a government of exiles to take over. However, we do have the option of establishing the United Kingdom as a puppet state of Japan.

Option A: Establish a Puppet Great Britain

Release a puppet United Kingdom under Japanese control. This would greatly displease Canada and result in a moderate amount of dissent, as the Japanese public generally does not support the idea of acting dishonorably towards Canada.

”Japanese blood should pay for Japanese gain!” – Text on leaflet handed out at nationalist rally in Tokyo


Option B: Hand the Territory to Canada

Cede Great Britain to Canada and allow Canada to establish a new order in Great Britain. This will greatly please Canada.

”For decades we have scorned European attempts to establish European order in Asia, and now some amongst us agitate to establish Japanese order in Europe? Whether or not it is moral to do so, we must also recognize how preposterous the concept is. Give it over to the Canadians, and let us move forward towards greater ends, in unity with our allies.” - Shigeaki Tsuda, Minseito member of the Diet


(Socialists and Nationalists would have had the option to break up the UK into England, Wales and Scotland in order to break the power of a potential naval rival)

Vote #2: The Irish Question

Ireland has gained control of the German High Seas Fleet and Japan will have no choice but to invade Ireland. The question remains about what to do with the island once it is seized. The Irish, in the chaos after the Great War, had freed themselves from British control, and the British king in exile had never renounced his claim of sovereignty over the island. However, public opinion is against handing the island back to British rule.

Option A: Maintain Irish Independence Under Japanese Influence

Ireland would be granted independence as a Japanese puppet. This would slightly displease Canada, Australasia, and Delhi, as they would be concerned about the precedent set by Japan unilaterally rejecting the British Empire’s claimed borders. It would please the United States of America, which is under great pressure by its Irish immigrant population to support Irish independence. It would also slightly please the Republic of China, which would appreciate a show of Japan’s commitment to self-determination and anti-colonialism.

”Is our government sending our men to die for democracy like they claim?! Or are they sending our men to die for the British Empire?! Britain for the British and Ireland for the Irish!” - Tomomi Kondo, Shakai Taishuto member of the Diet


Option B: Hand Over Ireland to Canada/the UK

Irish territory would be transferred to Canadian or British occupation. This would slightly please Canada, Delhi and Australasia, while displeasing the United States and slightly displeasing the Republic of China.

”What would you all say if a foreign power had decided to rip Korea from us? That is a British decision and Japan ought to respect whatever process they decide.” - Youta Nishikawa, Seiyukai member of the Diet


Vote #3: The Algerian Question

Japan has already decided once not to assist National France with their Algerian rebellion, but the rebellion has endured for months and captured all of Morocco and most of Algeria. Algeria represents a potentially important base for Entente operations in the Mediterranean, but Japan assisting an unpopular National French regime against anti-colonial revolts has the potential to irritate other Entente members.

Option A: Help the French

Japanese forces in East Africa would be sent north to help put an end to the rebellion. This would please National France, but it would slightly displease the Republic of China as a violation of Japan’s professed anti-colonial and democratic beliefs.

”The capture of Britain has certainly given us new bases, but having bases in Algeria would allow for more strategic flexibility when it comes to the attack on Europe. If National France is having trouble putting this down, then we should go wrap it up before it becomes more of a problem.” - Hiroo Yoshioka, IJA General


Option B: Reaffirm Japan’s Previous Policy

The Japanese forces would be redeployed to Britain, and National France would be left to handle the situation on their own. This would displease National France but slightly please the Republic of China.

”The National French aspire to invade and liberate their homeland but they can’t even defeat a rabble like the FLN? Let them figure it out on their own, because if their army is so pitiful they can’t deal with this situation then we are better off not having them when we invade Europe.” - Takamasa Komori, IJA General


Vote #4: The Mexican Question

Mexico has been occupying parts of the United States and Pacific States since the Civil War, and both have wanted them their territory back for months. The areas under Mexican occupation contain many industries and populations that could be used to recruit more divisions for use in Europe, and most importantly, Texas is one of the most oil-rich areas in the world, and Mexico has been selling Texan oil to the European Internationale for months. The USA, PSA, New England and Canada are willing to deploy their troops in an operation to seize the fields and deny the European Internationale a critical source of war materiel, but they seek Japan’s support for such a move.

Option A: Give the Go Ahead

A North American army will attack Mexico. The United States and Pacific States will be pleased but the Republic of China would be slightly displeased to see a popularly supported leftist government toppled for economic purposes.

”France’s infamous and dangerous armor needs oil to function, and Texas has been a major source. We must seize it, not only to deny them their oil, but to secure it for our own army, which guzzles a great deal of fuel that we do not produce in Japan!” – Fumiki Takemoto, IJA General


Option B: Veto the Proposal

Mexico will remain untouched. The United States and Pacific States will be displeased and the Republic of China would be slightly pleased.

”What is being advertised by the Americans as a restoration to democracy is nothing but a repeat of the imperialist land grab of 100 years ago! Do not let the war be an excuse for greedy capitalists to seize the wealth of oppressed nations for themselves.” - Hiromasa Niwa, Shakai Taishuto member of the Diet


The next update will have four votes centered around the allocation of territory in Africa and Asia. The update after that will have three votes centered around planning for the post-war world, which will conclude the conferences.

 
CONFERENCE VOTE #1: Auxiliary Maneuvers

The Entente will not be prepared to launch an invasion of Europe until at least 1942, and so there is time for other wars aimed at securing the Entente’s position. In addition, Japan must decide whether or not to transfer control of Great Britain to Canada.

Vote #1: The British Question

PROBLEM: Japan has invaded and occupied Great Britain, and while Canada has stopped short of demanding we hand over the territory to them, they have assumed for a long time that we would, and they have been preparing a government of exiles to take over. However, we do have the option of establishing the United Kingdom as a puppet state of Japan.

Option A: Establish a Puppet Great Britain

Release a puppet United Kingdom under Japanese control. This would greatly displease Canada and result in a moderate amount of dissent, as the Japanese public generally does not support the idea of acting dishonorably towards Canada.

Option B: Hand the Territory to Canada

Cede Great Britain to Canada and allow Canada to establish a new order in Great Britain. This will greatly please Canada.

(Socialists and Nationalists would have had the option to break up the UK into England, Wales and Scotland in order to break the power of a potential naval rival)

Vote #2: The Irish Question

Ireland has gained control of the German High Seas Fleet and Japan will have no choice but to invade Ireland. The question remains about what to do with the island once it is seized. The Irish, in the chaos after the Great War, had freed themselves from British control, and the British king in exile had never renounced his claim of sovereignty over the island. However, public opinion is against handing the island back to British rule.

Option A: Maintain Irish Independence Under Japanese Influence

Ireland would be granted independence as a Japanese puppet. This would slightly displease Canada, Australasia, and Delhi, as they would be concerned about the precedent set by Japan unilaterally rejecting the British Empire’s claimed borders. It would please the United States of America, which is under great pressure by its Irish immigrant population to support Irish independence. It would also slightly please the Republic of China, which would appreciate a show of Japan’s commitment to self-determination and anti-colonialism.

Option B: Hand Over Ireland to Canada/the UK

Irish territory would be transferred to Canadian or British occupation. This would slightly please Canada, Delhi and Australasia, while displeasing the United States and slightly displeasing the Republic of China.

Vote #3: The Algerian Question

Japan has already decided once not to assist National France with their Algerian rebellion, but the rebellion has endured for months and captured all of Morocco and most of Algeria. Algeria represents a potentially important base for Entente operations in the Mediterranean, but Japan assisting an unpopular National French regime against anti-colonial revolts has the potential to irritate other Entente members.

Option A: Help the French

Japanese forces in East Africa would be sent north to help put an end to the rebellion. This would please National France, but it would slightly displease the Republic of China as a violation of Japan’s professed anti-colonial and democratic beliefs.

Option B: Reaffirm Japan’s Previous Policy

The Japanese forces would be redeployed to Britain, and National France would be left to handle the situation on their own. This would displease National France but slightly please the Republic of China.

Vote #4: The Mexican Question

Mexico has been occupying parts of the United States and Pacific States since the Civil War, and both have wanted them their territory back for months. The areas under Mexican occupation contain many industries and populations that could be used to recruit more divisions for use in Europe, and most importantly, Texas is one of the most oil-rich areas in the world, and Mexico has been selling Texan oil to the European Internationale for months. The USA, PSA, New England and Canada are willing to deploy their troops in an operation to seize the fields and deny the European Internationale a critical source of war materiel, but they seek Japan’s support for such a move.

Option A: Give the Go Ahead

A North American army will attack Mexico. The United States and Pacific States will be pleased but the Republic of China would be slightly displeased to see a popularly supported leftist government toppled for economic purposes.

Option B: Veto the Proposal

Mexico will remain untouched. The United States and Pacific States will be displeased and the Republic of China would be slightly pleased.

The next update will have four votes centered around the allocation of territory in Africa and Asia. The update after that will have three votes centered around planning for the post-war world, which will conclude the conferences.


You may use my input as a part of your AAR.

Vote 1: The British question.

Option B: This cabinet member is of the opinion that we should give the British territory to Canada, as the land belongs to his majesty and should be returned. The war for Britain wasn't a war of conquest, but of liberation of a proud people from a syndicalist yoke. Having said that, I believe we should rent a harbor and an airbase for the purposes of a continental invasion for the duration of the conflict in Europe. (in game terms you would have a province with a port and airbase in your control).

Vote 2: The Irish question

Option A: While his majesty has not relinquished the ownership over Ireland de jure, it was done so in practice. The Irish state excists. We shouldn't step into an issue and therefore not hand over ireland to UK. As a compromise we could have an plebicite in Ireland after the war in Europe has ended. Because to this cabinet member it seems that the Irish state wouldn't exist if it didn't have popular support whithin Ireland.

Vote 3: Algerian question

Option A: Help the French. While it goes against our anti-colonial policy National France is our ally and it wouln't do any good to destabilise the region further. It is not known what kind of government would result should the rebellion be successful, but one thing is sure - they will not be sympathetic to Japan because we decided to not intervene. They would have more pressing concerns of their own.

Vote 4: the Mexican question

Option A: Give the go ahead to reclaim territory Mexico is occupying. They took the land unlawfully and are using it to not only support the enemy, but profiteer from the larger conflict.

 
Chapter Nineteen: Erin go Banzai (May 16 – July 16, 1941)

001.jpg


With the Union of Britain defeated, Japan fulfilled its promise to the Icelandic population, allowing elections to go forward and restoring civilian control of the republic.

002.jpg


Japan also fulfilled a promise to Canada.

003.jpg


While Sphere troops still patrolled Britain, the entire island was transferred to the jurisdiction of Canada.

004.jpg


While the restoration of British independence would be a process that would mostly not involve Japan, Japan and Canada were both sure to secure fleet basing rights for their fleets, which would now be permanently based in Britain. Britain had surrendered before the battle ever reached the far north of Scotland, which meant that the facilities in Scapa Flow were mostly undamaged.

005.jpg


With the land war finished in Britain, the air war begun in earnest. While the Internationale did not have heavy bombers with the capability to destroy great amounts of industry, they did use medium bombers to bomb Entente military positions and to disperse leaflets exhorting the British to sabotage their occupiers.

006.jpg


Japanese interceptor fighters were dispatched from Quebec to Scotland, to the only intact airbase in Britain, where they would rest and prepare before deploying south to England.

007.jpg


The defeat of Britain had other significance, namely that Japanese naval construction was of a lower priority now that the Entente navies of Canada and Japan, along with the rapidly growing United States Navy, held virtually unquestioned control of the sealanes, though Internationale raiders would continue to make a nuisance of themselves throughout the Atlantic. Therefore, convoy construction became a higher priority than before, as supplying the now global Japanese military became a greater burden.

008.jpg


009.jpg


Canada had flirted with the concept of a union between Great Britain and Canada, but instead they decided to establish the United Kingdom, though any previous motherland-dominion relations were a thing of the past. The dominions and the UK were equals under the law.

010.jpg


The arriving Japanese air squadrons in England, along with the newly reformed Royal Army of Great Britain, contributed to the new defense scheme of Britain. Manchurian forces would later be deployed along the southern coast to provide a significant impediment to landing forces alongside the native British garrisons. Ultimately the true defense of Britain would be what it had been for centuries: the grand fleets of the Entente, now unquestionably dominant.

011.jpg


Or rather probably unquestionably dominant. The Communal Navy was significant and had subsumed a great deal of exiled Republican ships, though most of the Republican carriers had been sunk. In addition to the Communal Army, the German High Seas Fleet was only a short distance away in Ireland. Entente war planners did not expect that Ireland would manage to cooperate effectively with the Internationale on naval maneuvers, but it would be prudent to remove the threat anyway.

013.jpg


014.jpg


023.jpg


024.jpg


Another threat taken seriously was the risk of a land-based bomber campaign against the supply lines from North America, Africa and Asia to the new nexus of Entente military activity. Smaller air forces such as that of the Netherlands and Italy had enjoyed carte blanche to bomb England, but now the Imperial Japanese Army Air Service was responding in force to secure the skies of Britain.

012.jpg


Meanwhile, the governments of the Entente were closely watching developments in Britain. Japan’s handover of power to Canada had been one made possible by trust. If Canada allowed a government offensive to the Minseito to take hold in Britain, it would show the Japanese that they could not trust their allies to act properly. Luckily, the United Kingdom instituted a civilian government and not a military one, which was taken as a good sign across the Entente.

015.jpg


An even better sign came when a proposal to institute martial law in order to snuff out syndicalists who hadn’t fled to France was shot down.

015a.jpg


015b.jpg


015C.jpg


The new British government would generally advance a policy of reconciliation, which was received well in those members of the Entente with influential socialist parties. However, the reversal of rural land reform which had been in place for almost twenty years was something of a chaotic affair, but only the Republic of China really protested.

016.jpg


In general, however, a sense of order and reconciliation reigned, and this was good news, as a massive French relief force had marshalled in Dunkirk. While they would not be able to cross the Channel successfully so long as the Entente armada was based in Britain, a sufficient amount of chaos and disruption in Britain may have provided an opening for them. The success that Japan found in its seizure of Britain carried with it a knowledge that France had mastered the same exact tactics and would ruthlessly exploit any opening it could find. The defense of Britain had to be airtight.

017.jpg


And so, it was time for the Entente to remove a threat. Ireland had not done anything particularly wrong to the Entente. They had aligned with Germany in order to protect themselves from the very Internationale whom the Entente was also working against. By all rights, Ireland should have been a partner for the Entente but the rulers of the nation were also veterans of the Easter Rising against the British Empire. Some progress had been made by Japan in convincing them of their good intentions, but the arrival of the German High Seas Fleet made the Irish government feel they had a stronger bargaining position, throwing a tremendous wrench into the proceedings. The Irish High Seas Fleet would not sink the Entente armada, but their mere existence provided a fleet-in-being challenge to the Entente control of the sea lanes. War sometimes demanded simple and blunt solutions, and while the Irish nation had a degree sympathy among the members of the Entente which were not part of the British Empire (and among a significant segment of those that were), their stubbornness would have to be resolved. And so the landing force departed.

018.jpg


The Entente had learned from the invasion of Cornwall, and dispatched two landing forces, one to opposite sides of the island. In doing so, they hoped to avoid a situation as in England when almost all of the Republican Army moved to defend against the landing. By splitting the Irish defenders, they would be able to get at least one of the invasion forces ashore without too many casualties.

019.jpg


Cavalry divisions were sent to Waterford, the hope being that they would land and be able to move north to Dublin.

020.jpg


The landing force that was expected to succeed was the one sent to assault the western shore of Ireland. The Irish defenders had expected the attack to come via the most direct route, and so their professional infantry was tasked with defending the eastern coast. The Japanese sent their very best to attack the militias that defended the western coast: veteran marines, armor and motorized infantry.

021.jpg


For a nation that was relatively insignificant in the wider war, Ireland did hold a surprise for Japan. Entente intelligence had never expected the appearance of Irish armor in County Mayo.

022.jpg


The armor was significantly smaller than the Japanese models, and their smaller guns could not pierce the Japanese tanks heavy armor. Due to this, the armor quickly left the west of Ireland and moved to shore up the front line in County Wexford where they had success against the unarmored forces landing there.

 
025.jpg


Soon enough the landing in the east was faltering. The cavalry there were taking significant losses aand not making a lot of headway.

026.jpg


However, their purpose was to land if possible and distract either way. Ireland had chosen to concentrate its effort on stopping one of the landings rather than fail to stop both.

027.jpg


The Irish had not counted on the mobility of the Japanese Army, however, as the mobile portions of the western landing force was directed to assault the rear of the defenses in Leinster province.

028.jpg


The Japanese were not willing to give up the effort to land in Leinster despite the success in Connacht.

029.jpg


The Irish kept up the fight in the hilly terrain of the area, ambushing Japanese columns using their intimate knowledge of the area. The Japanese had to adapt to these tactics.

030.jpg


Eventually both landings would succeed, though the eastern landing succeeded at a high cost, with almost twice as many Japanese dying as Irish.

031.jpg


The cavalry of the eastern landing needed time to reorganize after the vicious fighting.

032.jpg


Meanwhile, the motorized forces of the western landing which had had time to recover due to their easier fight and earlier victory were on the move. They rushed north to secure County Donegal, in order to widen the front and force the Irish defenders to spread out.

033.jpg


The Irish knew that their power lay in Dublin, and so they focused their defensive efforts there, but they did not wish to be cut off from their other power center in Belfast.

034.jpg


Meanwhile in Munster, a very unique battle was occurring. One of the first purely armor battles on record, two divisions of Japanese medium tanks were engaging one division of Irish light tanks. Military observers from around the world took interest to see how the Irish attempted novel tactics in order to compensate for their underpowered cannons and thin armor.

035.jpg


The battle would later evolve to include the Japanese Marines and a unit of Irish militia, and the Japanese would again learn to counter the Irish use of the terrain.

036.jpg


Finding themselves surrounded and their tactics countered, the Irish forces in the South surrendered. While the Japanese found their armor to be vastly superior to the Irish light tanks, they did ship a number of captured units back to Japan for research, hoping to find a novel piece of design that could be utilized in future Japanese designs.

037.jpg


With the Irish armor out of the picture and the south secure, the Japanese began an operation to split Dublin from Belfast in order to simplify the capture of both.

038.jpg


Pushing ahead despite supply difficulties, the Japanese divided the Irish army in two and quickly attacked Belfast.

039.jpg


A much larger attack on Dublin would follow.

040.jpg


The battle was short, and the city was declared open once the Irish Army surrendered. The Irish, with the enemy at the gates, had finally elected to trust in Japanese promises of good intentions.

041.jpg


The Irish divisions in Belfast would continue the fight, though they were taking heavy losses and were highly demoralized.

042.jpg


Finally, they too gave up.

043.jpg


Four years after the war between Japan and Germany broke out, the once-German and now Irish High Seas Fleet finally had no port left to call home after fleeing from Europe to Asia to Africa and back to Europe.

044.jpg


045.jpg


The Entente armada gave chase, sinking one battlecruiser and one heavy cruiser, but the highly disciplined High Seas Fleet avoided engaging in an attempt to make it to the south of Ireland.

046.jpg


047.jpg


048.jpg


However, the war was over, and everybody knew it. Michael Collins surrendered his nation unconditionally, and the High Seas Fleet was scuttled south of Cork. The Entente command were baffled that the German commanders of the High Seas Fleet would rather sink the ships than offer them up for use against the Internationale, but the story of the High Seas Fleet would end up matching that of Mitteleuropa in the end: their arrogance and stubbornness in refusing to submit to the Entente would lead to their destruction.

049.jpg


Exactly two months after the official fall of the Union of Britain, their long time enemy and neighbor fell as well.

050.jpg


To the shock of many, the Japanese would keep their promises and reconstitute the Irish republic, allowing Seán Lemass to lead a provisional civilian government. Liberalism supplanted the conservative nationalism which had ruled Ireland for the last few decades.

055.jpg


While the British Empire did resent having Ireland removed from it by Japan, Ireland and the United Kingdom quickly came to terms on a trade relationship. Centuries of enmity were overshadowed by the fact that they were two liberal democracies on a continent unfriendly to them.

CONFERENCE ROUND 2: Territorial Adjustments

The war against Mittleuropa has resulted in the Entente and Japan in particular occupying a great deal of territory. The anti-colonial stances of the Minseito and Shakai Taishuto means that there is little popular will for Japan to administer this territory as colonies, and so there are many questions on how to best organize the territories in question. (Seiyukai and Domei would be able to consider keeping the territory as colonies)

Vote #1: Sarawak

051.jpg


The territory of Sarawak was once a British protectorate before the Germans assumed control. The Japanese then assumed jurisdiction over the territory after returning the remainder of Borneo to Indonesian control. Administering the territory as a colony is out of the question, so the options available are either to release the territory as an independent state or to transfer it to Indonesia.

Option A: Transfer the Territory to Indonesia

This option would please Indonesia for obvious reasons but slightly displease the Republic of China, as the business component of the Chinese republican movement has many contacts amongst the Chinese population in Sarawak and is eager to develop a close economic relationship with Sarawak, something that would be more complicated if the territory becomes a part of Indonesia.

”Indonesia is already a large multi-ethnic nation that has endeavored to provide autonomy for the many peoples contained on its islands. Why should Sarawak be any different than Java or Bali?” - Ikuto Toiguchi, Seiyukai member of the Diet


Option B: Grant Sarawak Independence

This option would grant the territory independence. It would displease Indonesia and slightly please the Republic of China.

”We do not need to transfer more territory to the Dutch colony. Sure they have made many promises regarding independence, but why should we force even more people to have their dreams of self-determination rest upon the flimsy foundation of a European’s promise?” - Iku Takenaka, Shakai Taishuto member of the Diet


Vote #2: New Guinea

052.jpg


The Japanese have assumed control over the German quadrant of New Guinea, but like Sarawak, there is no popular will to continue administering the colony. Independence of just the one quadrant seems unsustainable however, and so there is a question as to whether to transfer the territory to Indonesia or Australasia, who both claim it.

Option A: Transfer the Territory to Australasia

This would please Australasia but displease Indonesia.

”Who would want to transfer it to Indonesia? The borders would be hideous!” - Sousuke Shikikawa, Kyoto globe merchant


Option B: Transfer the Territory to Indonesia

This would please Indonesia but displease Australasia.

”Australasia has made no concrete promises towards decolonizing their portion of New Guinea, and so I would rather see the territory in the hands of a nation that has at least promised such a move.” - Hidesuke Andou, Minseito member of the Diet


Vote #3: Fate of the Legation Cities

053.jpg


054.jpg


The Legation Cities’ existence reflects the time in which they were created. When the cities were established, Germany was hoping to maintain the balance of power as well as make sure that all the imperial powers’ interests were represented. But now the German Empire is gone, and of the remaining states and successor states with legations in China, only Russia and Austria are not members of the Entente. Russia is despised by the Entente and so their opinion is of little consequence and Austria dares not challenge the Entente with the Internationale breathing down their necks. The Republic of China demands that the cities be ceded to them immediately, but some of the other members of the Entente wish to wait until after the conflict to negotiate a settlement regarding the termination of their legal rights in the cities. Japan may either push to end the legation arrangements or convince China to wait.

Option A: End the Legation Cities

The Legation Cities would be annexed by the Republic of China, but their armed forces would disband as the foreigners who command and organize them would return to their homelands. The annexation would clearly greatly please the Republic of China but it would slightly displease the United States, Pacific States, Australasia, Canada, National France and Delhi, all of whom enjoy economic privileges of one kind of another in the cities.

”China for the Chinese! Imperialists out now!” – Chants heard during solidarity protest held by Shakai Taishuto in Hiroshima


Option B: Postpone the Decision

The Legation Cities would not be annexed by the Republic of China in any time frame covered by this LP, unless they decide to attack on their own (which is unlikely unless I’m forgetting an event). This would greatly displease the Republic of China, who resent the imposition of the legations immensely, but slightly please the United States, Pacific States, Australasia, Canada, National France and Delhi.

”The law is the law, and just because China has switched governments so often since the treaties were signed does not make the treaties void. If we allow China to take what they want without respect for the legal rights of the legations, then they will be emboldened to disrespect international law in the future.” - Itsuo Kai, Domei member of the Diet


Vote #4: The Future of Central Africa

The territory in Africa once controlled by Mittelafrika is now controlled by Japan in the east, National France in the northwest, and the South African Federation in the South. Japan has no interest in administering colonies in Africa, and so it is already understood that Japan’s sphere of influence in the east will be granted independence. However, a bold proposal by a pan-African faction in Dar es Salaam has caught the attention of the Japanese government, which is now considering it.

056.jpg


Option A: Establish the Bantu Federation

The Bantu Federation would claim the larger borders and because National France and South African Federation have no legal claim to the territory, they would be under pressure to transfer their territory to the new nation, though it would displease both nations. The Republic of China would be pleased by Japan’s aggressive posture on decolonization and the United States of America’s more mild anti-colonial position would cause them to be slightly pleased.

”How long have our African comrades waited for freedom?! Japan has the power in its hands to free millions of Africans. If we do not use that power, then we are criminals of the same caliber as the colonizers themselves.” - Yurina Katagiri, Shakai Taishuto member of the Diet


Option B: Establish the East African Union

The East African Union would claim the smaller blue borders. Because this is expected already, this would neither please nor displease anybody.

”I am as sympathetic to the cause of African freedom as anybody, but I worry about the wisdom of antagonizing our allies by supporting this proposal. Surely decolonization can progress once the conflict is finished. Why accelerate the process and risk the coalition we need to win in Europe?” - Hiroaki Higuchi, Minseito member of the Diet
 
Chapter Twenty: Déjà Veracruz (July 17 – October 9, 1941)

001.jpg


024.jpg


On the same day as the surrender of the Collins regime in Ireland, an era ended in China as the legations emptied and were handed over to the Republic of China. The legations had been prepared to be put under siege ever since the leftist victories in the Chinese elections, but the Entente was able to get together and put enough pressure onto the Legations to stand down and be annexed by the republicans. The move was accompanied by an even broader scheme to nationalize foreign assets. The other Entente powers grumbled that Japan was giving China far too much without concrete guarantees of help, but they would be nowhere without Japan’s guidance and so they swallowed the indignity.

002.jpg


Other territorial changes in the month of July included the transfer of Sarawak to Indonesia.

003.jpg


German New Guinea was also handed over to Australasia.

004.jpg


034.jpg


Everything seemed routine until the Japanese shocked their allies by backing the pan-African faction and supporting the creation of the Bantu Federation.

005.jpg


This was the time for bold moves, as the war meant that Japan’s allies needed her enough to overlook how Japan repeatedly broached their legal rights with regards to legations and colonies. Indeed, the USA and PSA’s complaints about their loss of privilege in China were overshadowed by Japan overriding Chinese objections to the invasion of Mexico.

006.jpg


American and Pacifican forces had their own battle plan, but Japanese commanders advised Canada and New England on the mobility tactics which had led to success in Britain. Canada had its own armor and New England had their own motorized troops, and they hoped to use them to as spectacular an effect as Japan had.

007.jpg


Rather than attacking Dallas or Houston, a massive attack was launched towards Austin in order to threaten the avenue of retreat from both cities. If the Entente could trap the Mexican Army in hostile American territory, then it would be easier to make them surrender.

008.jpg


012.jpg


The New English infantry attacked from Western Colorado, hoping to cut off Denver from the rest of Mexico’s territory.

009.jpg


010.jpg


For whatever reason, the French protested the attack on Mexico, apparently not realizing the United States and France were already in a state of war.

011.jpg


Austin fell quickly, and the Canadian armor moved south towards Corpus Christi, though the wetlands in the south of Texas made this more difficult than the assault across the plains.

013.jpg


The Pacific States was also rendered complete for the first time as the Mexican occupation zone around San Francisco was snuffed out, something that the Pacific States had hoped to accomplish for years.

014.jpg


The Canadian philosophy to this point had been to use armor in support of infantry, but following the Japanese example, they pushed their armor forward across the Rio Grande.

016.jpg


The hope was that this would keep the Mexicans on the back foot and prevent the large salient centered on Amarillo from being evacuated south.

017.jpg


018.jpg


The outbreak of war in North America might have perhaps encouraged opportunists, but nobody followed through just yet.

019.jpg


The Canadians learned the same lessons as the Japanese in short time, that the armor could forge ahead but could not be expected to stand up to a determined assault from a larger infantry force.

020.jpg


Instead of trying to hold Monterrey, the Canadians instead moved to the coast and abandoned the city, while the New English motorized forces made a bold move to cut all of Mexico’s supply lines to the occupied territories.

021.jpg


The Canadian armor linked up with their slower comrades in Matamoros and attacked south towards Mexico City.

022.jpg


It was not fast enough to prevent the Mexicans from recapturing Monterrey, but the Mexican advance would end up dooming them.

023.jpg


Encouraged by the Japanese to keep up the pace, the Royal Canadian Army then began an attack on Veracruz while the battle around Monterrey was still ongoing.

025.jpg


The battle in that city would end shortly, as American forces arrived to attack along with Canadian forces.

027.jpg


028.jpg


With Monterrey under control permanently, the road to Mexico City was wide open.

031.jpg


That city would soon fall, and with it the entire Mexican government and the prodigious flow of oil from Texas to the Internationale.

029.jpg


030.jpg


The surrender of Mexico would coincide with the end of two conflicts in South America, as La Plata won against Brazil and Peru and Colombia would agree to peace after Colombia’s inability to help its ally in Ecuador.

026.jpg


However, while peace reigned in the Americas, war would break out again in the Middle East. India, without consulting its allies, would decide to attempt to occupy Persia before Turkestan could occupy it. This resulted in the Arab bloc of Egypt and Arabia declaring war on the Entente.

032.jpg


Egyptian forces began to attack in all directions out of Sudan, putting the National French, who had yet to handle the Algerian rebellion, under even more pressure.

033.jpg


More to Japan’s chagrin, their new project in Africa was now under attack. Fortunately, the Japanese had not yet withdrawn JEF-Africa. As fires went out, more began.

015.jpg


035.jpg


Fortunately for the Minseito, good news came from the British elections, where the Liberals won, providing another liberal voice in the Entente.

FINAL CONFERENCE ROUND: Postwar

Current Attitudes of the Allies:

United Kingdom: 100% Committed

Canada (Very High): +++, --, --

National France (Moderate): --, -, -

Republic of China (Very Low): +++, ++

India (Moderate): -, -

United States (Moderate): ++, ++

Pacific States (High): ++, -

South African Federation (Moderate): --, --

Indonesia (High): =

Australasia (Moderate): ++, -, -

While the task of defeating the Internationale, and now the Arab bloc, looms large, the Entente must look to postwar policy. There are a variety of issues on which the Japanese may earn help now by promising their allies things later.

Vote #1: French Sovereignty

After the liberation of Britain and the handover to Canada, the regime in Algiers confidently stated that it was now their turn. This is something that makes the Minseito highly uneasy, as the conduct of the National French regime has been less than in concordance with the views of the Minseito or their sometimes partner, the Shakai Taishuto. However, the foundational treaties that formed the modern Entente after the fall of the homelands spell out that the very purpose of the alliance is to return control of each nation’s homeland to the exiled governments. Therefore, a split has formed within the Entente. The “Old Entente”, led by Canada, who formed the alliance seeks to honor the treaties, while the “New Entente”, especially the United States and Republic of China, does not trust the Algiers regime and would rather see a brand new Fourth Republic that has nothing to do with the Algiers regime.

Option A: Return the Territory to National France

The territory of France would be handed over to National France after the end of the war. This would greatly please National France, displease India and slightly please Canada and Australasia. It would displease the Republic of China and the United States.

”The Minseito is as weak against syndicalism overseas as they are at home. The French population has been exposed to this sickness for decades now, and they have been the most virulent in attempting to spread it across the globe. The tough stance of the Algiers regime will be necessary for a long time before the French people can be trusted with democracy.” - Binya Okuno, Domei member of the Diet


Option B: Refuse to Recognize Algiers as the Rightful Government of France

The territory of France would be reconstituted as a Fourth Republic under Japanese influence. This would please the United States and Republic of China. It would greatly displease National France, displease India, who is the most in league with National France among the original Entente members and slightly displease Canada and Australasia.

”The National French are not only immoral, but inept! It is a great shame to Japan that we ally with them, but to grant them a leading role in Europe would guarantee another disastrous war in Europe.” - Yukiyo Hirakawa, Minseito member of the Diet


Vote #2: Russia

russia.jpg


It is a common opinion amongst socialists and liberals across the Entente that Russia is a much worse regime than the syndicalist regimes of Europe. However, Russia has mostly turned in on themselves after their aggressive posturing against the Sphere in its earliest days and so the Internationale’s threat has been prioritized. Some in the Entente believe that the Vozhd in Russia must be deposed as a humanitarian end, that the pogroms and forced resettlements demand a response. In addition, Russia controls a great deal of territory which are claimed by China and Transamur. However, Russia has had trade relations with other Entente members, and many members of the Entente are furious that Japan would consider committing the Entente to even more war.

Option A: Russia Must Fall

Russia will be attacked after the war in Europe is wrapped up. This would greatly please the Republic of China, which hopes to reclaim its territory from Russia, and it would please the United States, the government of which has been lobbied heavily by its large Jewish population to do something about the Vozhd’s anti-Semitic pogroms and slightly please the Pacific States for the same reasons. It would displease India, who distrusts the pan-Chinese movement as an attempt to make India a definite third fiddle in Asia behind Japan and China. It would displease National France as some of the justifications used for the potential attack on Russia could be directly applied to their own conduct, and so they are afraid of the precedent. It would slightly displease Australasia and Canada which have endeavored to trade with Russia as a part of their Pacific-facing trade policy.

”The Vozhd is the most evil man in the world today, and if the Minseito had listened to us and resolved to eliminate them before ever getting us involved in conflict with the Internationale, thousands of lives would have been saved. I suppose late is better than never, but do not believe that this would atone for your sins.” - Itsuko Sakata, former Shakai Taishuto member of the Diet, barred for overly seditious sentiments


Option B: Enough War!

Russia will not be attacked. This will please India and National France and slightly please Australasia and Canada. It will greatly displease the Republic of China, displease the United States, and slightly displease the Pacific States.

”NO MORE WAR, NO MORE DEATH!” – chant during anti-war protest in Sapporo


Vote #3: The King Doctrine

turkestan.jpg


The Arab bloc has found itself in a three-front war against the Entente and Turkestan, and the lack of preparedness on the part of the Entente means that Turkestan will likely be successful in capturing a significant portion of the Middle East, if not almost all of it. While the Arab bloc has not been allies of the Entente, they have been friendly enough before India attacked Persia, and the prospect of unfriendly Turkestan trying to impose its radical Islamist reforms upon a wide variety of populations in such an economically and geographically important region is causing worry of economic chaos in the years to come. Therefore, Canadian Prime Minister Mackenzie King is proposing a doctrine that would declare the Middle East to be an area of “particular importance” to the Entente. While this would not result in immediate conflict with Turkestan, it would mean that as a point of policy, the Entente would seek to evict Turkestan from the Middle East in order to secure India, the Suez Canal, and the many oilfields of the region.

Option A: Back the Doctrine

If Turkestan manages to control a large portion of the Middle East, the Entente would be committed to evicting them at the earliest possibility, most likely after the European war. If the Entente adopts a hostile stance against Russia, they would almost assuredly align with Russia for common security. This would greatly please India, who finds Turkestan to be a great threat. It would please Canada, who proposed the doctrine in the first place. It would displease the United States and Indonesia, who are both enjoying a great deal of prosperity due to their prominence in the oil trade and would profit from the reduction of Persian oil production. It would also slightly displease the Republic of China, who believes the entire venture to be imperialistic, though their objections are tempered by their tacit understanding that their ambitious industrialization projects would require a great deal of Middle Eastern oil.

”The Middle East is the crossroads of our modern world, and the global economy that we are building in the Entente could not thrive if the Middle East was controlled by a hostile power. For the good of the Entente, and the good of the local population who would suffer under the Turkestani whip, this doctrine must be approved by the Entente.” – W. L. Mackenzie King, Prime Minister of Canada


Option B: Tell King to Back Down

Turkestan would be allowed to keep whatever they conquer, though the Entente will do its best to keep Arab territory away from them. This would please the United States and Indonesia, slightly please the Republic of China, greatly displease India, and displease Canada.

”Once again the capitalists come up with a new threat to excuse their imperialist behavior. This is nothing more, nothing less than the imagined or trumped up offenses which the European imperialists would use as justification to subjugate other nations into their colonial empires. Do you really believe that the Entente would seize all of that oil and then give the Arabs back their freedom? If so, you are a fool.” - Yoshito Umaba, Shakai Taishuto member of the Diet
 
Chapter Twenty-One: It’s All Up In The Air (Europe & Africa: October 10, 1941 – February 9, 1942)

Capture.PNG


United Kingdom – 17 – Full Commitment: The restored United Kingdom feels a closer kinship to Japan than at any point in history and has enthusiastically committed their forces to the cause, even though their proximity to the danger means they were bound to regardless of Japanese diplomatic efforts.

Canada – 13 – Full Commitment: Similarly, Canada is committed to seeing the fight through.

National France – 10 – No Commitment: The situation in National France is quite different and even the modestly successful diplomatic push by Japan to secure National French support was far too little, especially given the Japanese refusal to help against the Algerian rebels. National France is willing to allow Entente use of their bases, but any other assistance would be at their discretion.

Republic of China – 11 – Full Commitment: The Republicans in China have been plied with promises and bribes to a point where they are committing fully to the fight despite its relative unpopularity amongst the population.

India – 16 – Full Commitment: Japan and Canada fed India promises that the Middle East would be in their sphere of influence, and they are now fully on board despite their previous concerns about Japanese hegemony.

United States – 12 – Full Commitment: The United States of America is also fully committed to the war effort, its confidence built up by the operations in Mexico and eager to reopen the markets of Europe to its recovering industry.

Pacific States – 1 – 75% Commitment: Japanese diplomats made a major misstep by skipping the Pacific States when making a major trip across North America. This offense was made worse when the United States government announced that Japanese diplomats had agreed with their position that the Pacific States ought to rejoin the Union. The decision by the Pacifican administration to retain a much larger home guard than necessary is a pointed rebuke at both Japan and the United States, even if they still plan to send the majority of their forces overseas.

South African Federation – 5 – No Commitment: A Japanophobic attitude has caught on lately among the conservative South African whites who run the nation, who are convinced that Japan and China are in league with the black population of Africa to end all white political power on the continent. Thus, the South African Federation is inclined to sit at home and watch events unfold.

Indonesia – 13 – Full Commitment: Indonesia is still very much committed to the idea of liberating the Netherlands and achieving full independence according to the concord reached a year or so back.

Australasia – 4 – 50% Commitment: The Japanese diplomatic mission to Canberra was a disaster, and Australasian leaders ended up feeling as though Japan had very little respect for them. Nevertheless, the Australasian populace does credit Japan with liberating the mother country, and so Australasia will nevertheless provide some support.

~*~*~*~

000.jpg


One aspect of the Australasians’ protest was their intention of leaving their large fleet, including the mega-flagship George V, at home rather than sending it to Europe. This ended up being just fine by the Japanese, who entrusted the defense of the Pacific to their annoyed comrades.

001.jpg


The naval situation in Europe was mostly well in hand, and more important in the immediate was the organization of the Entente air effort, which had thus far been a haphazard improvised affair.

002.jpg


The massive airbases built by the socialists in the thirties now hosted pilots and aircraft from all over the world.

003.jpg


The airbases were complicated in their day to day functioning, as the various airforces which used American, British, Japanese or Chinese designs all operated in the same bases, using different logistics chains for their specific ammunition, parts and fuel needs.

004.jpg


The problems were expected to some degree, but there were also issues with the pilots cooperating. A full-fledged riot broke out in Hull when an English prostitute refused to serve any Japanese customers. Before long, there were rumors that the Japanese had murdered the prostitute (they had not) and townsfolk and the white airmen of the RAAF were both demanding that the Japanese be moved to another airbase. The incident came to a close when RCAF airmen enforced a truce between the two sides.

005.jpg


Racial tensions between the Asian and white airmen were worst in the inactive bomber squadrons, where the airmen had more time to get in trouble. They had mostly taken a back seat in the fighter squadrons which had been active the entire time. The Chinese, initially expected by many of their allies to be a subpar air force, turned out to have the most effective interceptor squadrons in the entire alliance.

006.jpg


007.jpg


The Chinese also dispelled any doubts about if they were actually going to fight their far-left cousins or if they were going to simply perform allegiance in order to secure what Japan had promised them. The European syndicalists excoriated the Chinese social democrats for their participation, decrying them as opportunistic nationalists willing to see the cause die in Europe in order to see China united.

008.jpg


Entente air commanders were pleased by the cohesion shown by the international fighter squadrons and sought to plan a major operation in order to achieve similar results amongst the bomber squadrons. The target would be Brest, the haven of the Republican Navy and the cobbled together fleet of the American Reds which had ferried thousands of syndicalist exiles to France rather than surrender to the Entente.

009.jpg


The raid was planned to demolish the port and any ship inside it, but it was also decided to use the operation as a testbed for other bombings. While the naval bombers attacked the port itself, other bombers were tasked with bombarding any road or railroad into the region.

010.jpg


On top of all of that, the Brittany region was blanketed with fighter cover to ensure that the bombers were unmolested as much as possible.

012.jpg


In addition to the raids by land-based bombers, the carriers would also join in, as well as establish a blockade to catch any ships which attempted to escape.

011.jpg


013.jpg


On the morning of November 7, 1941, a swarm of locusts descended upon Brest and Brittany, triggering fears in Paris that such a large concentration of aircraft meant that the Entente was already invading France.

014.jpg


015.jpg


016.jpg


The first day of the raid claimed the Saratoga and utterly demolished the port facilities.

017.jpg


It was a decent showing for the first day, and the returning fighters encountered and badly damaged a numerically inferior French force sent for a counter-raid.

018.jpg


The raiders came a second time a few days later.

019.jpg


020.jpg


021.jpg


This time they sunk two carriers and a battleship.

022.jpg


There were many damaged syndicalist vessels attempting to repair, but the port facilities were damaged beyond usability, and the French were having a very difficult time getting supplies to the port in order to begin repairs.

023.jpg


The Entente’s marshalling of disparate forces did not stop with the massive air force brought to bear on Brittany. The various submarine forces of the alliance were collected in French West Africa, from which they attempted to cut off any trade convoys headed for the mainland.

024.jpg


However, most of the headlines across the Entente nations were consumed by the Brest raids throughout the winter months. The final Republican carrier was sunk in the second raid.

025.jpg


026.jpg


Now facing a force with no carriers, the Australasians sunk two battleships and a heavy cruiser.

027.jpg


028.jpg


029.jpg


030.jpg


031.jpg


By the end of the year, the Brest raids had sent four carriers and ten battleships to the bottom of Brest harbor.

032.jpg


However, the Communal Navy still operated out of its base in Marseille, continuing to hunt Entente convoys across the Atlantic. It was here that Japan’s decision not to help the National French defeat the Algerian rebels turned out to hamper the war effort. Due to the ongoing war consuming Algeria and Tunisia, there were no secure bases from which the Entente could reach Marseille.

~*~*~*~

001.jpg


The outbreak of war between the Entente and the Arab Bloc had complicated things, and the failure of Japan to secure any promise of support from either National France or South Africa proved especially frustrating at this point.

002.jpg


Fortunately, Japanese infantry was available to halt the Egyptian advance. The Egyptian attack from Sudan was half-hearted, as most of the bloc’s attention was focused on their battle with Turkestan in Persia.

003.jpg


004.jpg


Despite the French regime’s disdain for Japan, they had actually gotten along somewhat well with the Bantu Federation, who had pragmatically recognized the need to cooperate with their neighbors. Therefore, the French sent divisions to support the Japanese infantry defending the Bantu Federation from Arab encroachment.

005.jpg


006.jpg


The weak Egyptian advance was turned back totally, and soon the only impediment to Entente advance was the tough terrain and poor infrastructure.

007.jpg


008.jpg


Nevertheless, the advance pressed northwards, as the Japanese sought to prevent their most hated ally from gaining territory in Africa.

Next update is contemporaneous, hence no votes.

 
Chapter Twenty-Two: The Triumph of the Triumphs (The Middle East: October 10, 1941 – February 9, 1942)

001.jpg


Sphere war planners reacted to the news that India had declared war upon the Arab bloc with horror at first. The Arab bloc had always been figured as a neutral force that would not object to Entente use of the Suez Canal, even if they were selling oil to the enemy.

002.jpg


The Indian Army assured their allies that they would be able to mobilize quickly enough to gain significant advantage in Persia before Turkestan pushed to the Persian Gulf. The first challenge was marshalling the far-flung Indian Army into the remote and poorly developed frontier along the border of Balochistan and Persia.

003.jpg


The Indian Army had changed dramatically from the last time it had operated as an army of all India. Inspired by the success of mobile warfare across the globe and empowered by its growing industrial base, the Indian Army elected to develop a large and mobile army and by the beginning of the war against the Arabs, the Army consisted of over 40 divisions, half of which were cavalry and the other half infantry. The term cavalry was quickly becoming more of a relic of tradition rather than a strict definition of horse-mounted troops.

The hallmark of the new Indian cavalry was a piece of British engineering which had been carried to Canada by exiles and then distributed to India through the Empire’s technology-sharing programs. With the advent of the war in India and then the global war, the Indian Army came to be obsessed with one piece of technology amongst the wealth of knowledge that had fled Britain: the Triumph motorcycle. Domestic Indian production led to thousands of motorcycles designed for rough terrain and bad roads being deployed amongst the new Indian cavalry.

005.jpg


The new semi-motorized cavalry divisions had their first taste of combat in one of the least risky situations one could imagine: they assaulted the rear of the Arab defenses that were already under severe strain from the numerically superior Turkestani army attacking from the north.

006.jpg


The important part was not whether or not they could beat the surrounded Arabs. Everybody assumed they could do that. What the Entente was most concerned with was if the Indian cavalry divisions could beat the Turkestanis to Persia’s precious oilfields.

007.jpg


008.jpg


The Indian cavalry, assured that Turkestan would not attack and risk all-out war with the Entente, was encouraged to advance with reckless abandon.

009.jpg


010.jpg


Turkestan was aware of what the Entente was attempting, and was trying itself to move south and capture Ahvaz, not only for its oil but for its port. They were much closer, but they were marching on foot while the Indians were advancing in fast moving columns of motorcycles.

011.jpg


012.jpg


013.jpg


The Indians won the race and began to advance into Iraq.

014.jpg


022.jpg


015.jpg


With the Persian client state split in two by India and its local rival, attention now turned to a region where the Indian cavalry’s mobility would truly pay off. Out of the mountains of Persia, great deserts and plains lay in between the Indian salient and the goal, the Suez Canal.

016.jpg


The initial push into Persia had been initiated by the handful of cavalry units already stationed in Balochistan and Sindh, but they were followed closely by a large corps of 10 divisions that was tasked with hunting and neutralizing the Arab armies moving to reinforce their collapsing eastern frontier.

017.jpg


The Indians moved hundreds of thousands of men across their narrow corridor across south Persia, who would then spill across Iraq and Arabia like a flood.

018.jpg


The main battle group headed south towards Arabia, giving chase to the largest Arab army in the area.

019.jpg


The hope was for that group to push right through to the Holy City before the Arabs could organize an effective defense after their rout from Persia.

021.jpg


Riyadh fell quickly, but the Indian cavalry was beginning to tire after a 1400 mile advance around the Persian Gulf from Gwadar to Riyadh.

020.jpg


023.jpg


024.jpg


Other smaller cavalry groups advanced into Syria and the Transjordan almost unopposed.

025.jpg


The attack on Mecca began to slow as the Arabs finally established an effective concentration of force.

026.jpg


027.jpg


No spirited defense was going to save the Arab bloc at this juncture however, as the Indians had effectively split the Arabs in three, surrounding and destroying their units in Kurdistan.

028.jpg


And finally the arrival of Indian infantry bringing up the rear of the fast cavalry broke the stalemate in Mecca.

029.jpg


It was none too soon. The fast maneuvers of the French and Japanese militaries had inspired militaries the world over, but the Indian cavalry units in Arabia were not quite as speedy as Japanese armor was on British roads and so the salient found itself in danger of being cut off.

030.jpg


Another bold advance by the Indians towards the canal was actually cut off, but thankfully the Indian Army in Palestine was close enough to quickly move to re-establish supply lines.

033.jpg


Unfortunately for the Indians, the campaign of maneuver and speed hit a major geographic obstacle in the form of the Suez Canal, a natural chokepoint. The Indians had the numbers to force their way across, but they would need time to regroup and plan a proper assault.

034.jpg


The capture of Mecca triggered the surrender of Arabia, leaving Egypt on its own and with a decent portion of its army trapped in the Transjordan.

035.jpg


036.jpg


However, the Indian’s zeal for rapid conquest had an unintended consequence, namely that it created a land border between the Entente and the proverbial mainland of the Internationale.

037.jpg


As the French units guarding what had once been a peaceful border crossed into Syria, the Indian mission to take the canal and the heart of Egypt took on new urgency. The sooner Egypt fell, the sooner they could link up with the Entente in Africa and redeploy to stem the French advance.

038.jpg


039.jpg


Port Said fell to the Indians after a short battle, and eight divisions poured across. Five turned south to secure Suez and fully block the canal to hostile forces, and three turned west to take Alexandria before the Egyptians could patch the hole in their lines.

041.jpg


042.jpg


The problem for the Egyptians is that most of their army had been trapped on the wrong continent and they had scant forces to defend their homeland.

043.jpg


045.jpg


Cairo was taken from both east and west. It only took a few days to fall, and with it fell the Arab bloc.

046.jpg


The quick collapse of the Egyptian defenses in Africa was a blessing, as it allowed the Indians to deploy forces in time to save Damascus.

047.jpg


The Entente attack on the neutral Arab Bloc was controversial, and India caught flak from its allies for its unilateral decision to attack, but their speed in preventing most of the Arab land from falling to Turkestan caused many to forget their protests. The Japanese, typically, took the lead in establishing a Sudanese rump state without consulting the Indian occupiers of north Sudan or the French occupiers of Darfur. The attack violated international norms, but it was hard for any pragmatist to argue that Entente control of the Canal and the oilfields was a bad thing. And besides, the Arabs would certainly be better off than if they had fallen to the fundamentalist menace of Turkestan? Either way, what was done was done, and the world’s attention quickly returned to the clash between the Entente and Internationale.

~*~News Items~*~

n1.jpg


n3.jpg


Sinn Fein Wins in Irish Elections, Bins Tricolour

n2.jpg


Peru Challenges La Platan Hegemony in South America

n4.jpg


040.jpg


National Protection Alliance Attacks Russian Bloc, Entente Vetoes Preemptive Strike

~*~*~

STRATEGY VOTE: The Attack on Fortress Europe

PROBLEM: The seizure of the Middle East has resulted in engagement between the Internationale and Entente across the Turkish border with the defunct Arab bloc. Entente war planners are now tasked with deciding how to proceed in the war against the Internationale.

The Internationale has, according to Entente intelligence estimates, in the neighborhood of 260 to 300 divisions in Europe.

The Entente has:

70 divisions in the British Isles (including the high quality Japanese divisions)

125 divisions in North America waiting to be deployed to the British Isles

115 divisions in the Middle East or currently being deployed to the Middle East

armenia.jpg


The strategic question is whether to divert the divisions in North America towards the Middle Eastern front and designate that front as the primary axis of attack. Forces in the UK would be retained and used in secondary actions that would be decided later. The other option is to designate the Middle East the secondary front and hope that the divisions in the Middle East do the best that they can and create opportunities for the main attack force in the UK to attack the heart of the Internationale.

Option A: Wait to Strike At France Itself

North American divisions will marshal in the UK as planned and a decision will be reached at a later date with regards to assaulting a location or locations in Western Europe.

”The path through the Caucasus and Ukraine is circuitous and long. I would rather this war not turn into a long march through the syndicalist hinterlands. The entire Internationale is dependent upon France, and if we strike quick and viciously against France, the rest of the enemy will be weak and easy to push over!” – Omar Bradley, US Army General


Option B: Concentrate Force Against Turkey

North American divisions will marshal in Egypt and be used to push through the Caucasus and the Ukraine. Smaller operations in the west that do not target France itself will be decided at a later date.

”Those who propose such a bold action forget how dangerous the landings in Cornwall were. That was against a depleted Republican enemy who had lost half of its power during a Canadian misadventure. An amphibious assault in the West would be set upon by far more reinforcements and have a far greater task. Let us instead advance across the axis already secured for us. It will take longer, yes, but it puts us at much less risk.” – Bernard Montgomery, Royal Army Field Marshal
 
Chapter Twenty Three: A Line In The Sand (February 26 – April 15, 1942)

001.jpg


The Indian Army had been seeking an opportunity to score a great victory as an army of all India. It was hoped that this would be a chance to unify India in spirit beyond the political reunification. The swift defeat of the Arab Bloc was just that opportunity. It had been a great accomplishment in that the operation was carried out with enough speed and daring to prevent most of the Middle East from falling into the hands of the Bukhara Caliphate.

The operation had not actually blooded the Indian Army, however. They had executed a grand maneuver with light casualties, yes, but it was against a surprised enemy engaged against another powerful foe. And so when the swaggering Indian cavalry came into contact with the French invaders from Turkey, they were quickly educated in what modern war could actually be.

002.jpg


The Indians found out quickly that the veteran French units had better weaponry and more solid tactics.

003.jpg


Numerical advantage over the advance French units provided a few victories for the Indians.

004.jpg


However much the Indian press displayed photos of captured French soldiers, the Entente command recognized that the French would be a much stouter foe than the Arabs. Rather than allowing the Indian Army to advance with reckless abandon as they had just a few months prior, the Entente positioned infantry in defensive positions.

005.jpg


French cryptography had become very difficult to crack, as the remaining Internationale members revamped all of their cyphers after so many British Republican code machines were captured. It was known that the French were deploying troops across a front from Aleppo to the edge of Caliphate control, but how many divisions was utterly unknown. The Entente needed to wait and see what developed.

006.jpg


It was impossible for the French to mask the mobilization that took place. Details were again difficult to pin down, but a great French army had certainly entered the region.

007.jpg


Their arrival did not inspire panic, as it was followed shortly by the arrival of the Chinese Army.

008.jpg


As the Chinese adjusted to their first large scale overseas deployment, good news arrived for the Entente as the uncooperative National French and South Africans deployed their own forces to the front. They, as expected, refused to integrate into the Entente’s Eastern Command. Their obstinacy had consequences, as they would not participate in the Entente’s plans, but they did take responsibility for defense across certain sectors. No amount of enmity between those two nations and Japan would convince them that it was a good idea to allow potentially several dozen French divisions roll over such a vital region.

009.jpg


This was wise on their part, as the developing front line between the Internationale and Entente just about fell on the boundary line between the great deserts and the mountainous terrain of Anatolia. If the French were able to break through, their motorized elements would move even more rapidly in the rear than the Indian cavalry had.

010.jpg


The first large scale battle between the Indians and the French took place in northern Lebanon. The speed and efficiency of the Internationale logistics network allowed the French to bring their experienced and well-equipped infantry all the way to Syria, while the inexperienced Eastern Command fumbled about as amateur armies speaking different languages had to learn under hostile conditions.

011.jpg


Among the divisions arriving to reinforce the line was JEF Africa, which had seized just about every bit of rolling stock in the Sudan in order to redeploy from Khartoum to Iraq. The Indian commanders present on the front were eager to ask the Japanese, who had fought modern armies such as the French, to take strategic lead.

012.jpg


The Japanese idea of how to help the embattled Indians in Lebanon was a classic Sakai maneuver: rather than responding to the enemy attack, launch an attack on their weak points and throw their offensive off balance.

013.jpg


The Indians in Lebanon were not particularly pleased with this “help” as they continued to be outnumbered by troops that were individually of higher quality than the journeyman soldiers trying to hold the mountains.

014.jpg


The Indians sounded the retreat after taking eleven thousand casualties.

015.jpg


The arrival of the Korean Army in Beirut would help to stem any further advance into Palestine, however. The hope was that the temporary concession of northern Lebanon to the enemy would allow the other forces further inland to flank Aleppo and push the Internationale into Turkey.

017.jpg


The Entente counter-attack found success, unsurprisingly, on the plains west of Baghdad.

018.jpg


The hilly terrain in Syria was a tougher nut to crack. Being closer to the Internationale staging ground near Aleppo, it was also easier to reinforce than Iraq.

019.jpg


More sketchy intelligence came in about the size of the French reinforcements, and even accounting for a wide margin of error scared the attackers to death. More reinforcements would arrive daily, and so the attack was called off.

020.jpg


The French over-estimated how disorganized their enemy was, and attempted to attack Karbala, though the undermanned assault would eventually fail.

021.jpg


They did not fail in their counterattack against the Chinese motorized infantry in El Hillah. The Chinese had outrun their slower and much more numerous comrades still on the march from the south.

022.jpg


The size of French reinforcements made Entente commanders less and less hopeful about the potential of breaking through to the Caucasus and so the Chinese were pulled back so that they could fall in behind establish defensive positions.

024.jpg


Homs was still considered a point of important strategic interest however. Capturing it would effectively shorten the front as well as allow the Entente to threaten Aleppo itself.

025.jpg


The mass assault was called for with all divisions present in southern Syria and western Iraq. The problems were immediately evident. Poor communication among the coalition partners exacerbated the problems of too many divisions trying to use too few roads. All the while they were coming up against determined French defenders already dug into positions throughout the Syrian hills.

026.jpg


Homs would have been nice to have, but the risk of rendering the center of the Entente line too weak to resist a breakthrough attempt could have been disastrous, and so that attack was also called back.

027.jpg


028.jpg


It was time to admit what the situation was. The superior French logistics network had delivered an enormous force to the front in a record amount of time, and the Entente coalition could not hope to overwhelm it without being overly hampered by their own logistics and coordination issues. El Hillah and northern Lebanon were abandoned, and all forces in both areas were pulled back to established defensive positions.

It had taken a mere six weeks for the Middle Eastern front to transform from a small-scale battle between the Indian Army and French advance units to a stalemate where over two million men on both sides dug in along a five-hundred-mile front from Beirut to the Tigris. Neither side would be able to prevail in a frontal attack, and neither side was all that willing to attempt it, given the memories of the Great War. One side or the other would have to make a grand strategic maneuver to change the nature of the war altogether, and the Entente was planning just that.

STRATEGY VOTE #1: Operation Shogun

It has been decided that arriving divisions from North America should be combined with the present divisions in the British Isles to form the Entente Western Command, and that the Western Command should invade France as soon as possible. This goal is seen as plausible to achieve in 1942 given the enormous portion of French forces redeployed to hold back the Eastern Command. Two battle plans have been drafted up, and resources are only available to execute one of them. Either one would be codenamed Operation Shogun.

Option A: Cross-Channel Assault

planA.jpg


A chink in the armor of the Internationale has been discovered, and it is namely the Netherlands. The Netherlands lost a large portion of its small army in America, and so several suitable landing zones in the Netherlands and Flanders are hardly defended at all. This plan sees the Western Command’s armor, cavalry and motorized divisions being landed in Flanders. The marines would attack Dieppe and attempt to capture Paris while being reinforced by the bulk of Western Command infantry. The goal of this offensive after establishing a beachhead would be to push south towards Alsace-Lorraine and Switzerland, and to divide France from its client states in the east. Criticism of this plan focuses on the idea that it creates too wide a salient in the push to Colmar, as inevitable French redeployments back to the homeland will fall upon the armored spearhead in unfavorable heavily forested terrain in Germany perhaps before the infantry landing in France can seize enough of France. Other criticism is that the largest concentration of French infantry left in the homeland is in Wallonia, and that that infantry could be easily deployed to respond to either landing.

Option B: Normandy-Poitou Pincer

planB.jpg


The second plan involves a separation of Western Command into two forces. Force A would have all of the cavalry and land in Normandy. Force B would have all of the armor and motorized divisions and land in La Rochelle. Both forces would be supported by marines and reinforced by infantry. Once ashore, Force A in the north would attempt to seize the industrial centers. Force B would attempt to capture the rest of metropolitan France, especially Marseille, the home port of the French Navy. It would also attempt to reach the border with Italy and prevent the Italian military from establishing strong defenses in the Alps. The goal of this plan is to destroy France’s industrial capability as soon as possible. While France will not surrender until its other territories in the east are also captured, the hope is that cutting off the Internationale from France’s industrial might would weaken all of the other client states as well as the French Army in Syria. Criticism of this plan focuses on the fact that it does not exploit any of the badly defended beaches in the Netherlands, which many planners regard as a rare and precious opportunity. The La Rochelle landing point is farther away and would take more time to reinforce than the cross-channel landing beaches, and the landing beaches are far enough away from one another that it would not be easy for one successful landing force to support the other if they face difficulty.

STRATEGY VOTE #2: The Persian Gambit

t01.jpg


The potential for Turkestan to attempt to strike at India had always been of great concern, and the King Doctrine was intended to protect the Entente in the region from precisely that threat. However, the Bukhara Caliphate has apparently elected not to strike.

t02.jpg


Inexplicably and also in contravention of Entente worries, Turkestan has not found common cause with Russia. Instead they decided to attack. Virtually all observers expect Russia to overwhelm Turkestan with their superior numbers.

With this in mind, an idea has come up on how to break the stalemate in the East.

planC.jpg


The plan involves pulling 35 mobile divisions (cavalry and motorized divisions) from the line, replacing them with Indonesian and Taiwanese divisions. These 35 divisions would be joined by 5 new infantry divisions from India and China, and after a declaration that Persia must be entirely free, all 40 divisions will cross the border into Persia. The hope is that Turkestan will have deployed all of its combat strength north against their superior Russian foe and that the rump state will be easily overrun. The advance would stop at the Persia-Turkestan border, in order to avoid antagonizing Russia prematurely, and also because the divisions are not available to expand the war into the wide expanse of Central Asia. The reason for this operation is not Persia itself, of course, but rather to use Persia as a back door to attack and seize Azerbaijan, which is the most strategically critical region in the entire war.

Baku is not only a great center of oil production, but it is, along with Armenia, the chokepoint which separates the Internationale territories in Turkey and Bulgaria from the main Internationale territories that stretch from France to the Caucasus. Seizing it would prevent the French divisions in the East from redeploying in response to the landings in Western Europe, and instead those divisions would have to either break the Entente’s occupation of the mountainous chokepoint or they would have to be ferried across the Black Sea, which, considering the poor condition of Internationale shipping, would likely take a long time.

The concerns about this plan are that the replacements on the line are of lesser combat effectiveness than the divisions diverted to this plan and that the shifts may cause the line to be unable to hold up against a general French offensive. Another concern is that the 40 divisions would be on their own to hold the Caucasus given the need for every other division to remain on the existing lines in Iraq and Syria. Opponents of the plan believe that the landings in Western Europe will inevitably cause divisions to be peeled away to defend the homeland, and that the reduced strength of the French in the Middle East will allow the Entente Eastern Command to launch a successful offensive.

Therefore, three options exist:

Option A: Do Not Approve the Persian Gambit

The attack will not take place, and the Entente Eastern Command will make a frontal attack along the existing front as soon as enough French divisions have been sent back to the homeland.

Option B: Approve the Persian Gambit For Before Operation Shogun

The attack will take place and Operation Shogun will launch once Azerbaijan is captured, thus preventing any of the French divisions from redeploying back home to defend against Shogun except by sailing to Ukraine. All of the 100+ French Divisions currently in the Middle East would remain and would have to be rooted out in that bad terrain.

Option C: Approve the Persian Gambit For After Operation Shogun

The attack will take place soon after Operation Shogun once a significant portion of the French Army in Syria has deployed to the homeland. This will then trap the remaining forces. Western Command will likely deal with reinforcements from the Middle East after the landings, but the Eastern Command will be faced with a smaller army than the enormous one currently in their theater.

 
Back
Top